


The Kicker Solo X is not an everyday subwoofer. It is a competition grade driver built to take massive power and move a serious amount of air. Put it in the wrong box and it will sound loud. Put it in the right box and it will hit hard enough to flex the roof and push a meter into numbers most systems never see.
The difference comes down to the enclosure. Airspace, port tuning, baffle strength, and mounting depth decide whether a Solo X reaches its potential or gets choked by a box built for an ordinary subwoofer.
What Makes the Solo X Different From Regular Subwoofers
The Solo X sits at the top of Kicker's lineup for a reason. Compared with a typical daily-driver sub, it is built around:
- A massive motor structure that needs a very deep box to clear it
- A square cone that moves more air than a round cone of the same size
- Extreme power handling that turns a weak enclosure into a weak point
- Heavy excursion that requires plenty of internal airspace to control
That combination is why most universal boxes do not work. A standard 12" ported box usually does not have enough mounting depth, does not have the right cutout for a square driver, and is not reinforced for the forces a Solo X creates at full power.
Why the Box Matters More for SPL Than Anything Else
In SPL builds, the enclosure works like an amplifier you do not have to power. A well designed ported box can add several decibels of output at its tuning frequency compared with the same sub in a poorly matched box. On a competition sub, that gap is the difference between an average result and a winning one.
Four box factors drive output on a Solo X:
| Factor | Why It Matters |
|---|---|
| Airspace | Too little chokes the sub and raises distortion. The right amount lets the cone move freely and produce deep, loud bass. |
| Port tuning | Sets where the box peaks. Lower tuning feels deeper. Higher tuning often meters louder. |
| Baffle strength | A thin baffle flexes under Solo X force and wastes energy. A double baffle stays rigid. |
| Mounting depth | The Solo X motor is deep. If the box is too shallow, the sub physically will not fit. |
The Best Boxes for the Kicker Solo X
All three enclosures below are designed specifically for the Kicker Solo X. They are made in the USA from high-grade 3/4" MDF and finished with a bed liner polymer spray that resists scuffs, moisture, and wear in a trunk or cargo area.
Every model in this XL SPL line shares three features that matter for competition use:
- Extra airspace compared with standard boxes, sized for high output drivers
- Double baffle 1.5" MDF front plate that stays rigid under heavy cone movement
- SMD TCR-1 terminal cup rated up to 2000 watts, with stainless steel hardware and a 5/16" bolt terminal
Single 12" Ported XL SPL for Kicker Solo X
The Universal Single 12" Ported XL SPL for Kicker Solo X is the best box for a single Solo X 12 and the most popular kicker solo x 12 box choice for daily SPL builds.
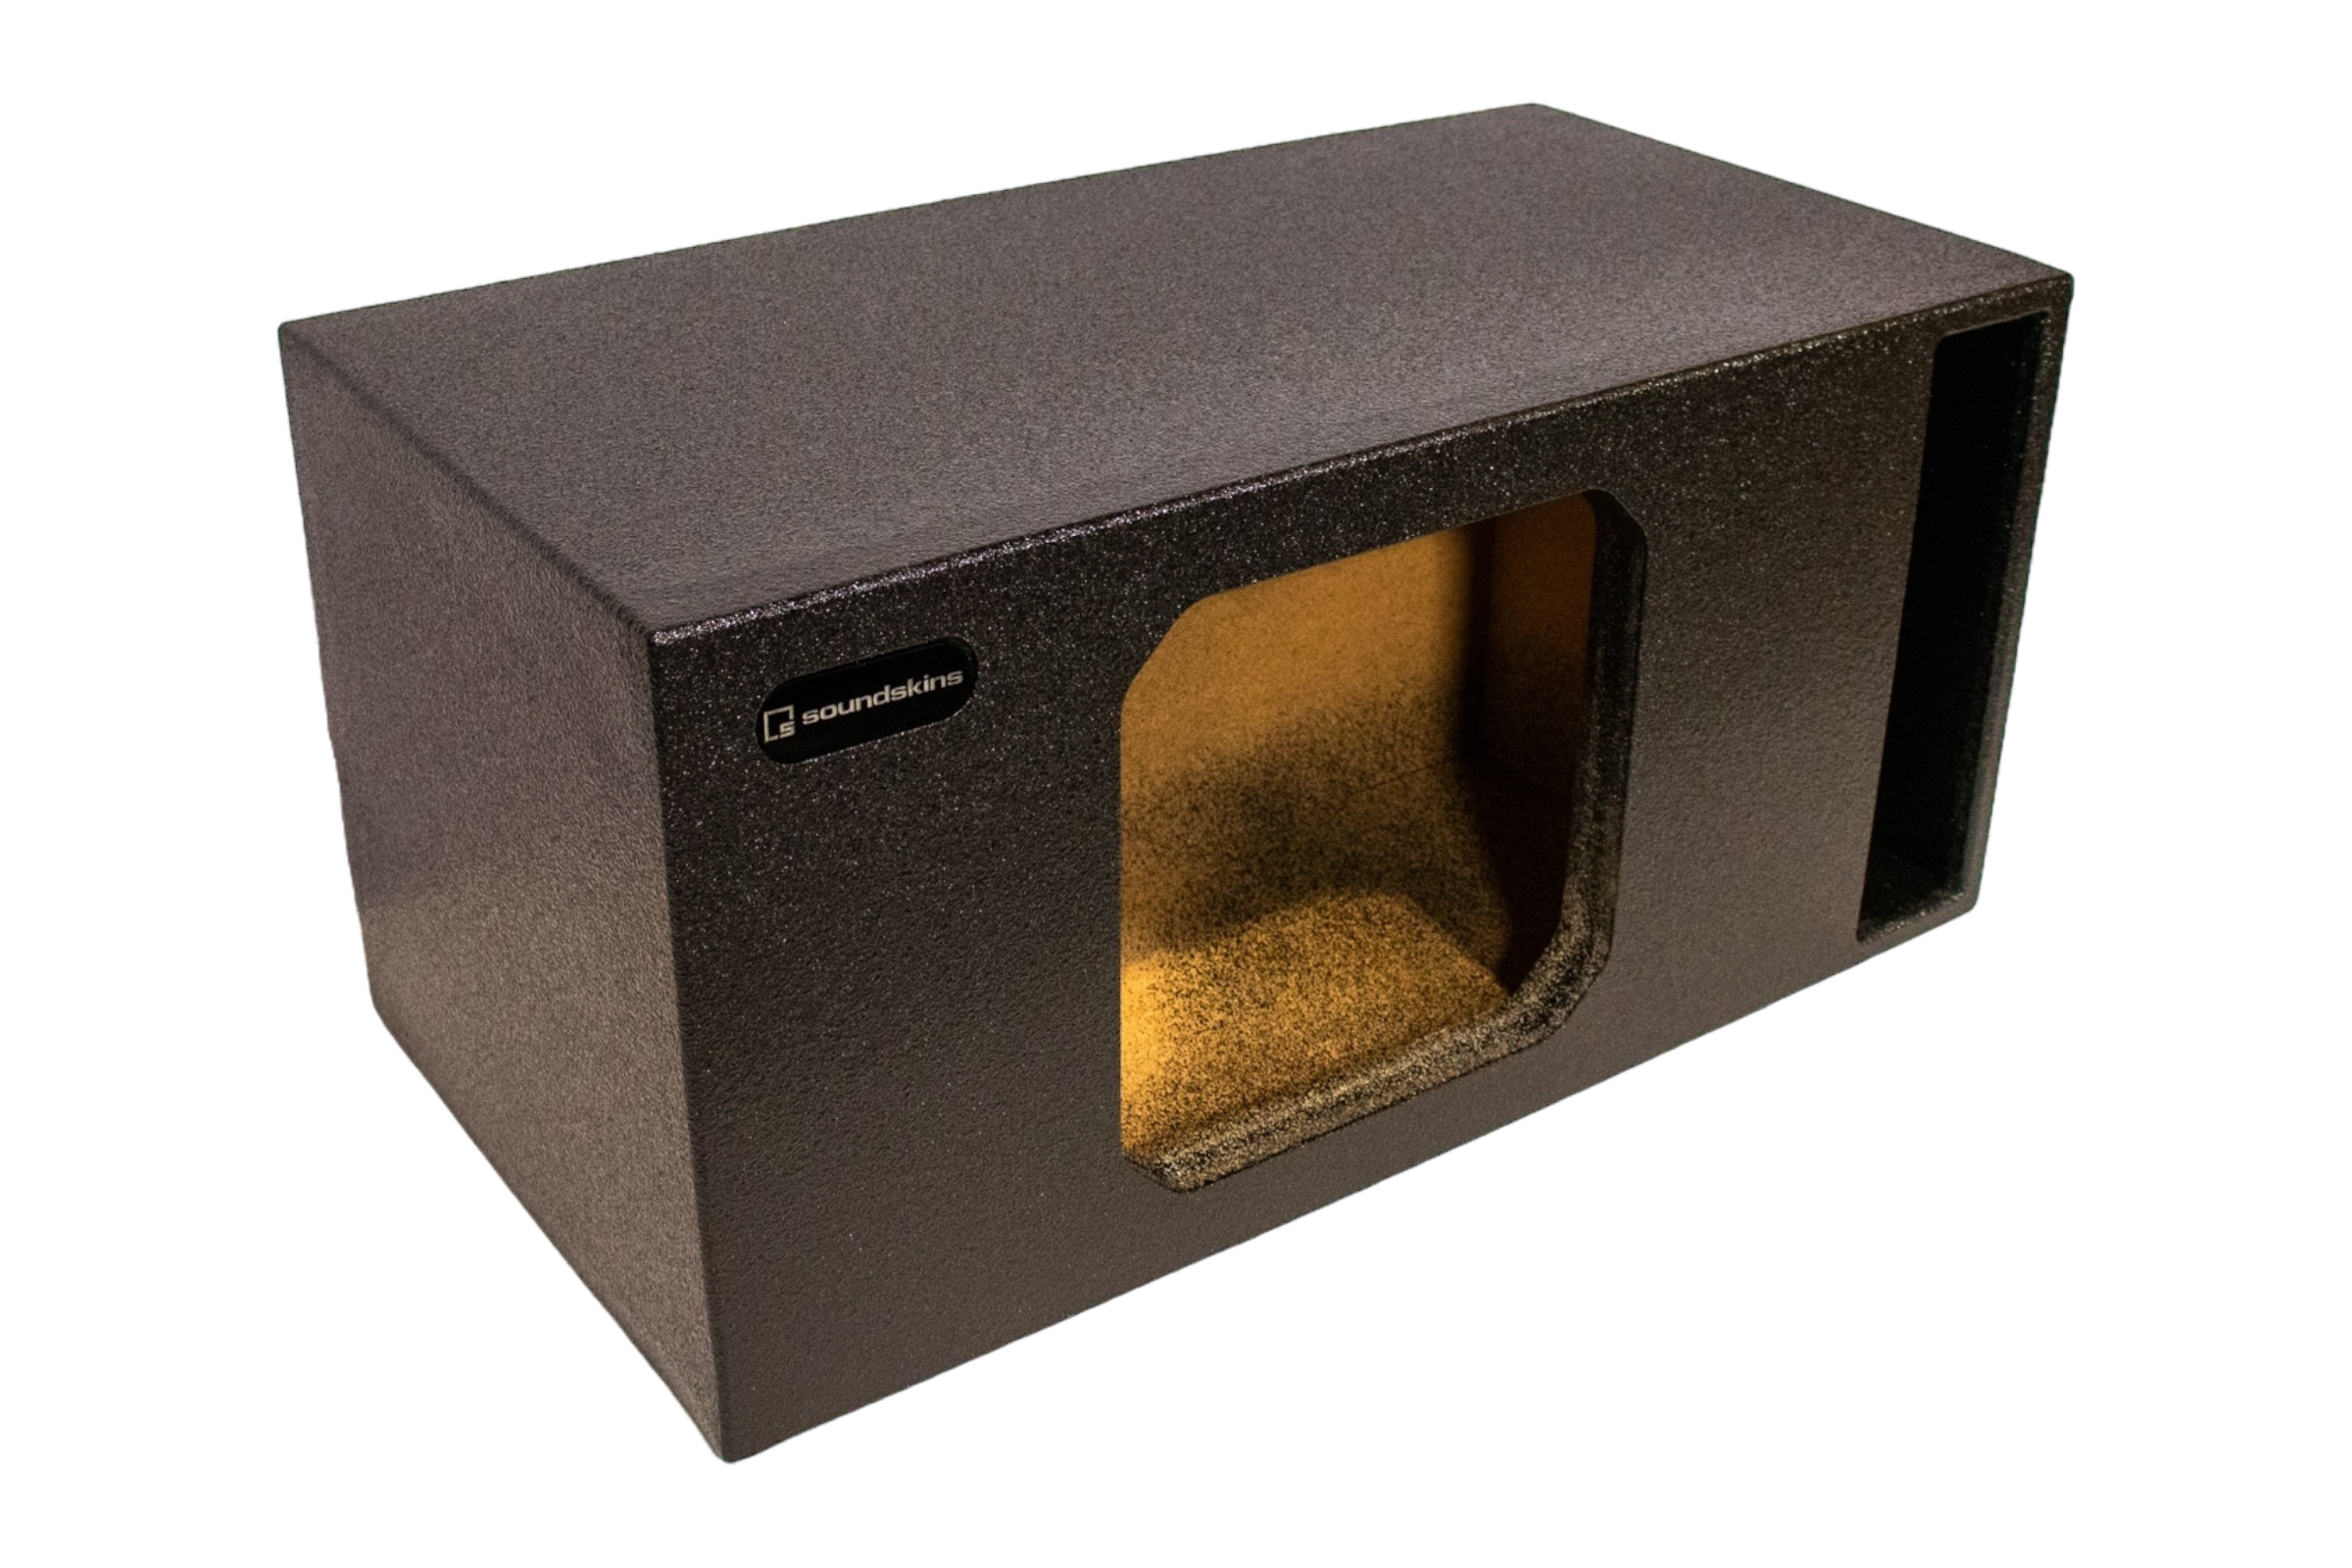
| Spec | Value |
|---|---|
| Width | 30" |
| Height | 14.5" |
| Depth | 16" |
| Mounting depth | 11" |
| Cutout diameter | 11.125" |
| Air space | 2 ft³ |
| Tuning | 40Hz |
| Weight | 44.5 lbs |
| Price | $382 |
At 2 cubic feet tuned to 40Hz, this box balances deep bass you can feel with the punch that meters well. Its 30" width fits most trunks and SUV cargo areas while leaving usable space.
Best for: A single Solo X 12 in a daily driver that still needs to hit hard.
Dual 12" Ported XL SPL for Kicker Solo X
The Universal Dual 12" Ported XL SPL for Kicker Solo X is the heavy hitter of the lineup and the go-to choice for maximum SPL.
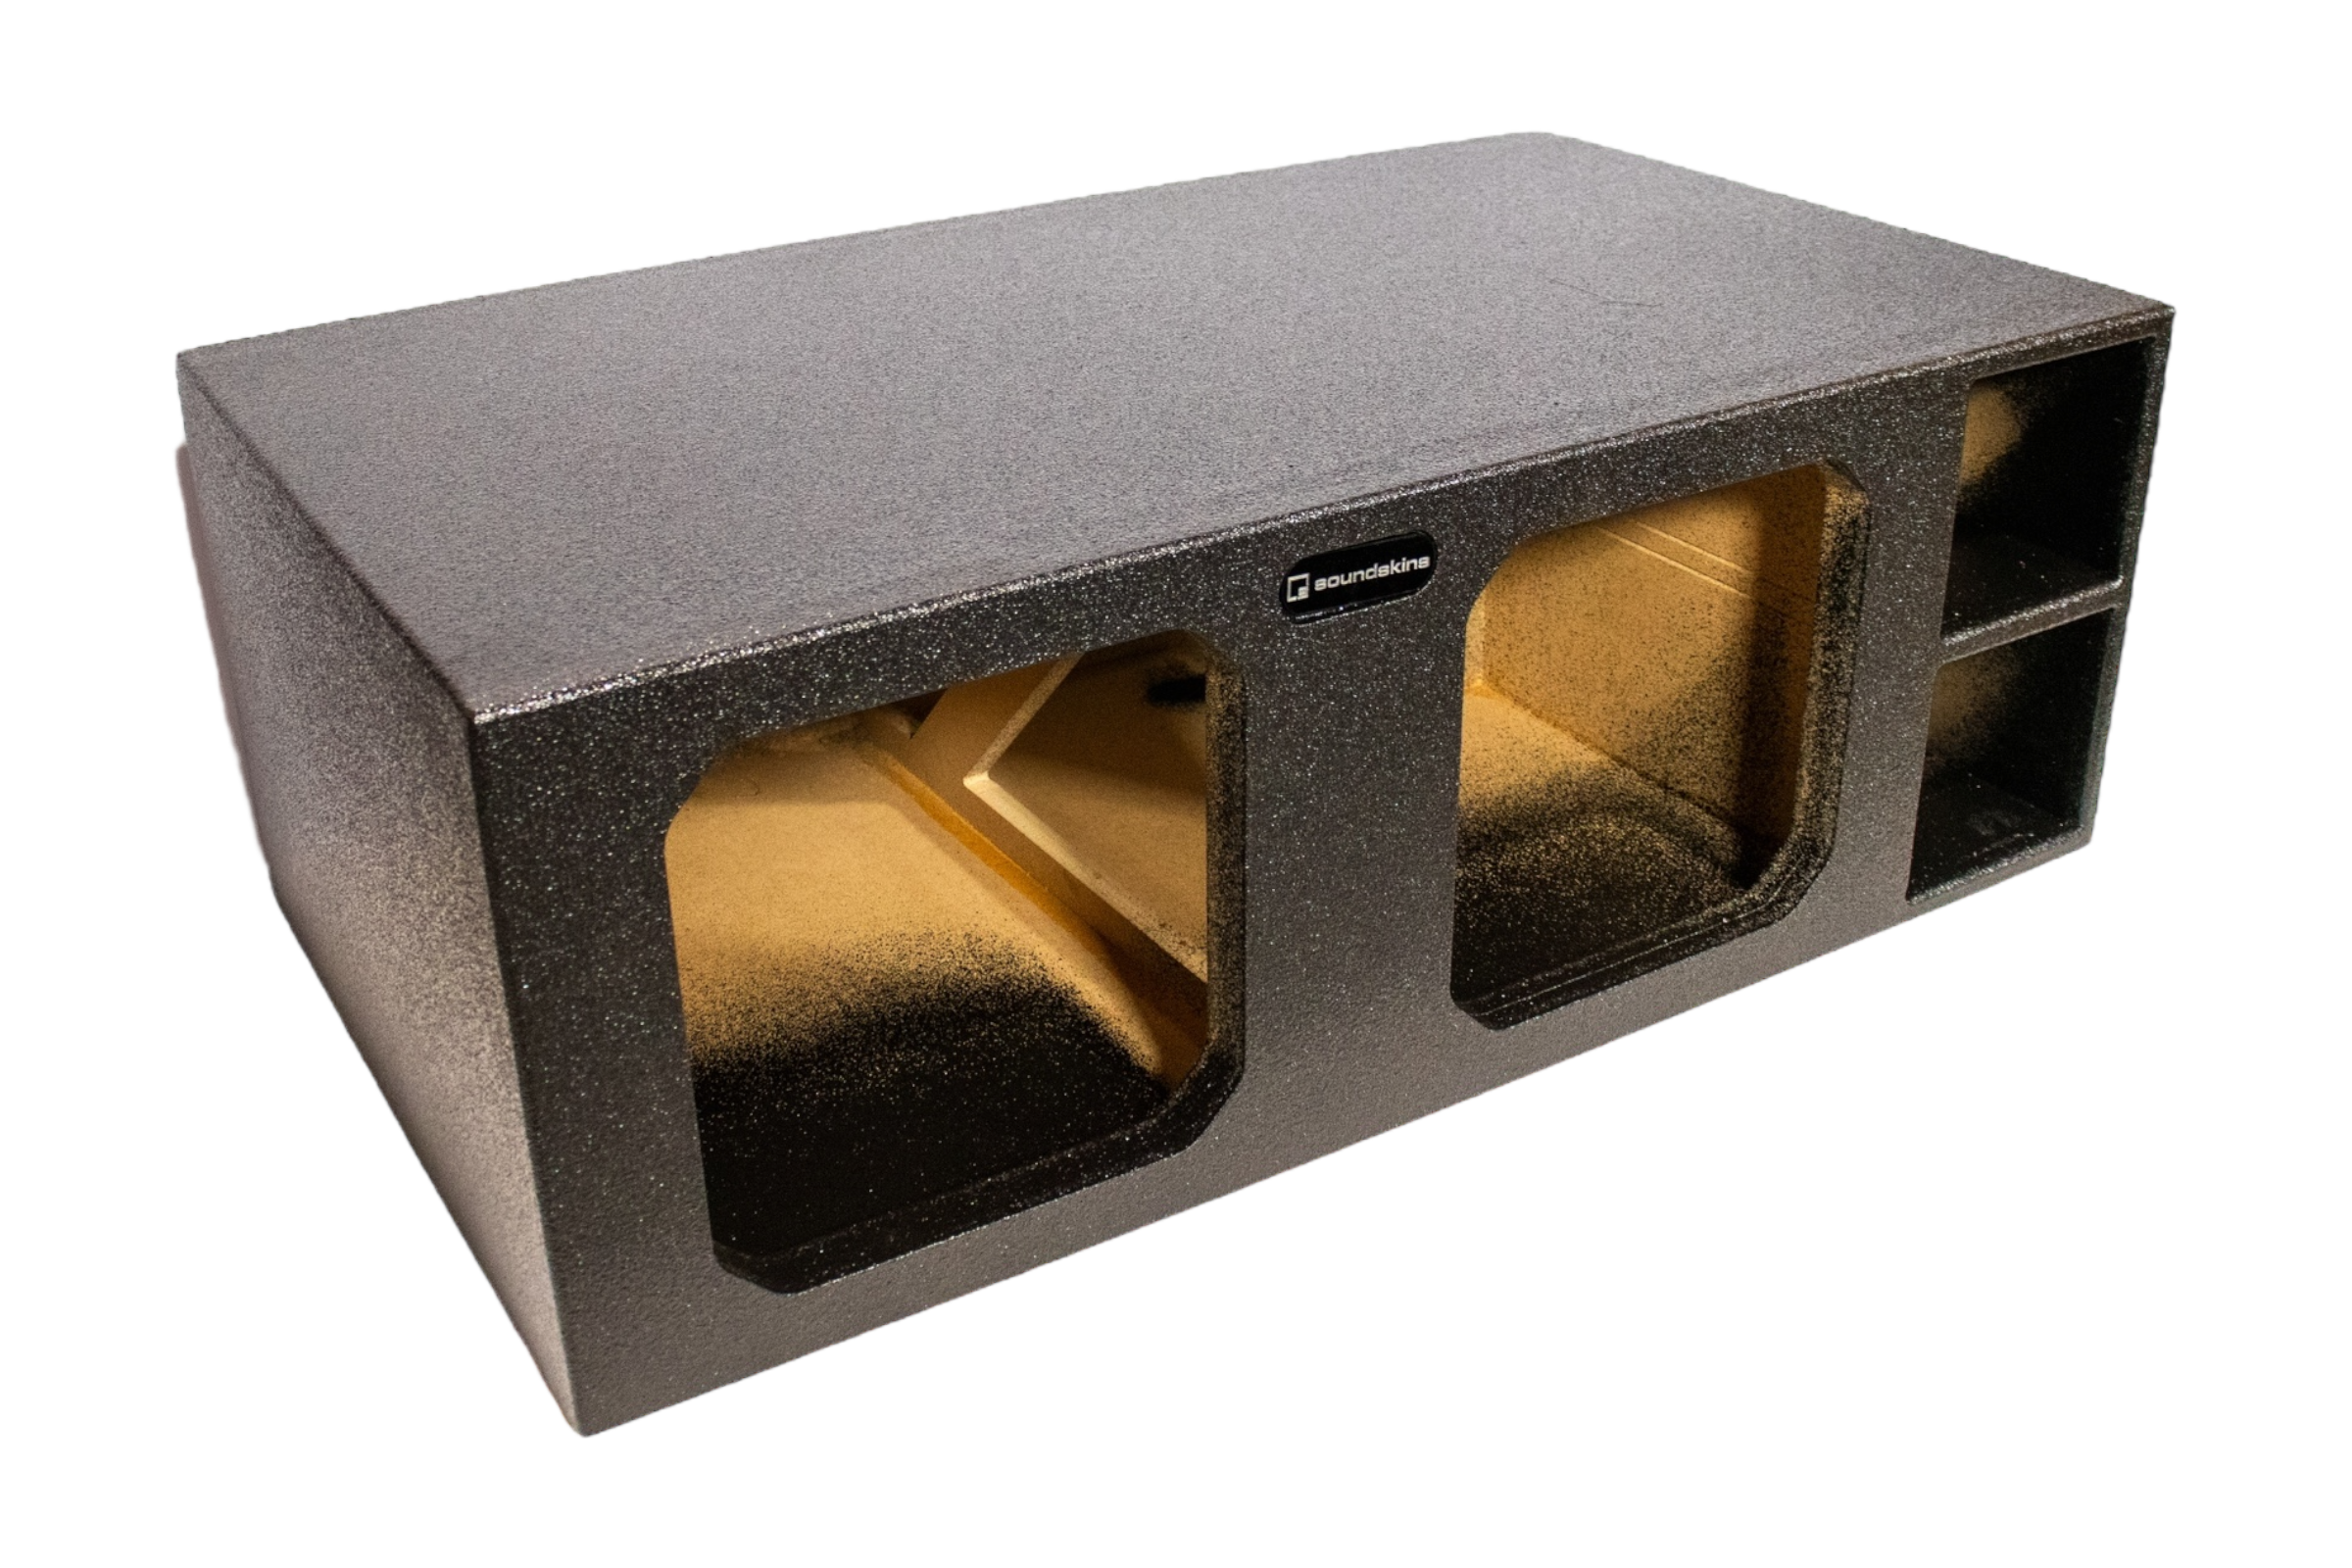
| Spec | Value |
|---|---|
| Design | Front fire |
| Width | 40" |
| Height | 14.25" |
| Depth | 23.25" |
| Mounting depth | 15.25" |
| Cutout diameter | 11.125" |
| Air space | 4.65 ft³ |
| Tuning | 40Hz |
| Weight | 67 lbs |
| Price | $482 |
With 4.65 cubic feet of total airspace and a 15.25" mounting depth, this box gives two Solo X 12s the room they need to move huge amounts of air. The front fire layout and 67 lb build keep everything rigid at full power.
Best for: Competition builds, SPL meters, and anyone chasing the loudest possible result.
Dual 10" Ported XL SPL for Kicker Solo X
The Universal Dual 10" Ported XL SPL for Kicker Solo X brings Solo X power to vehicles that cannot fit a dual 12 box.
| Spec | Value |
|---|---|
| Design | Front fire |
| Width | 35" |
| Height | 13.5" |
| Depth | 19.25" |
| Mounting depth | 12.75" |
| Cutout diameter | 9.35" |
| Air space | 3.1 ft³ |
| Price | $430 |
Two Solo X 10s respond quickly and hit hard, and 3.1 cubic feet of airspace gives them plenty of room. This is a strong choice for smaller trunks, hatchbacks, and builds where box size is limited.
Best for: Smaller vehicles that want dual Solo X output without the footprint of a dual 12.
Quick Comparison
| Single 12" | Dual 12" | Dual 10" | |
|---|---|---|---|
| Air space | 2 ft³ | 4.65 ft³ | 3.1 ft³ |
| Mounting depth | 11" | 15.25" | 12.75" |
| Footprint | Compact | Large | Medium |
| Output level | High | Maximum | Very high |
| Best use | Daily SPL | Competition | Small vehicles |
| Price | $382 | $482 | $430 |
Why Ported Is the Best Box for Solo X SPL
A sealed box can work with a Solo X, but ported is the clear choice for maximum SPL. The port reinforces output around the tuning frequency, which gives you more volume from the same amplifier power. On a sub that already handles extreme power, that efficiency translates directly into louder results.
A 40Hz tune, like the single and dual 12 Solo X boxes use, sits in a sweet spot. It is low enough to feel deep on real music, yet high enough to produce strong numbers on a meter. Very low tunes feel great but often meter lower. Very high tunes meter well but can sound boomy on daily music.
How to Get Maximum SPL From Your Solo X Box
The box is the foundation, but these factors decide how much of its potential you actually use.
Upgrade the Electrical System First
A Solo X will pull serious current. If voltage drops, the amp loses power, and output falls with it.
- Do the Big 3 upgrade. Replace the alternator-to-battery, engine-to-chassis, and battery-to-chassis cables with heavier gauge wire.
- Consider a high output alternator for larger systems.
- Add a second battery or a lithium bank for competition builds.
- Use proper power and ground wire sized for your amplifier's current draw.
Match the Amplifier Correctly
Choose an amplifier whose RMS output at your final impedance matches the Solo X rating. Wire the voice coils to land at an impedance your amp is stable at. Too little power leaves output on the table. Too much without control risks damaging the sub.
Set Gain and Filters Properly
Gain is level matching, not a volume knob. Set it with test tones and a multimeter or oscilloscope. Use a subsonic filter a few hertz below the box tuning to protect the sub from over-excursion, which is critical in a ported box.
Position the Box for Your Vehicle
Small changes in placement can change output noticeably. In a sedan, try the port facing the rear first, then facing the cabin. In an SUV or hatchback, test the box facing the rear hatch and facing forward. Measure each position and keep the one that meters best.
Pro Tip: Use a test tone sweep and an SPL meter to find your vehicle's peak frequency before a competition. Every car has a different cabin gain, and burping at the frequency where your car and box peak together often adds more output than another amplifier would.
Stop Rattles Before They Steal Your Output
At Solo X output levels, every loose panel in the vehicle turns into a noise source. Trunk lids, license plates, roof panels, and rear decks buzz and rattle, wasting energy and covering up clean bass. Rattles can even mask your peak on a meter.
Sound deadening locks those panels down. Treating the trunk lid, rear deck, roof, and doors keeps energy inside the cabin, where it builds pressure instead of escaping through vibrating sheet metal.
For an SPL build, the SoundSkins Pro Mega Sound Deadening Kit gives you 44 sq ft of 3-layer material for $412, enough to treat the trunk, rear deck, and other high vibration areas around the sub. Builders doing a full vehicle treatment can step up to the SoundSkins Pro Plus Workshop Kit, with 64.5 sq ft for $494.
Not sure which panel is buzzing? This guide on how to find the exact spot causing a car interior rattle helps you track it down fast. To see what separates competition-grade material from cheap mat, read what makes a sound deadening product professional grade.
Secure the Box Properly
A dual 12 Solo X box weighs 67 lbs before the subwoofers are installed. Add two heavy Solo X drivers and you have a lot of mass in the back of the vehicle.
Important Note: Always bolt or strap the enclosure to the vehicle floor or a secure mounting point. An unsecured box this heavy can shift during braking and becomes dangerous in a sudden stop or collision. Protect your hearing during testing and burps as well, since Solo X output levels can cause permanent hearing damage.
Common Mistakes With Solo X Boxes
- Using a standard universal box. Most lack the mounting depth and cutout a Solo X needs.
- Ignoring the electrical system. Voltage drop is the number one reason big systems underperform.
- No subsonic filter. Ported boxes unload below tuning, and a Solo X can over-excurse quickly without protection.
- Skipping sound deadening. Rattling panels waste output and can hide your real peak.
- Not testing box position. The same box can meter differently depending on where it faces.
Frequently Asked Questions
What is the best box for a Kicker Solo X 12?
For a single Solo X 12, the Single 12" Ported XL SPL for Kicker Solo X with 2 ft³ of airspace tuned to 40Hz is the best balance of output and size. For two Solo X 12s, the Dual 12" Ported XL SPL with 4.65 ft³ is the top choice for maximum SPL.
Should a Solo X be in a sealed or ported box?
Ported is best for SPL. The port adds output around the tuning frequency, giving more volume from the same amplifier power.
Why can't I use a regular 12" box for a Solo X?
The Solo X has a very deep motor and a square cone. Most standard boxes do not have enough mounting depth or the right cutout, and they are not reinforced for the forces a Solo X produces.
What tuning is best for SPL?
Around 40Hz is a strong middle ground for most vehicles. It sounds deep on music and still meters well. Your vehicle's cabin response will decide the final peak.
Do these boxes come with an upgraded terminal cup?
Yes. All three Solo X enclosures come configured with the SMD TCR-1 terminal cup, rated up to 2000 watts.
Do I need sound deadening for an SPL build?
For serious output, yes. Deadening stops trunk, roof, and panel rattles that waste energy and mask your true peak.
Turn Your Solo X Into a Competition Contender
The Kicker Solo X is built to be loud, and the right enclosure is what unlocks it. Pick the single 12 for daily SPL, the dual 12 for maximum output, or the dual 10 for tighter spaces, then back it with a strong electrical system and a rattle-free vehicle.
Shop Kicker Solo X subwoofer boxes at SoundSkins Global with free shipping on all orders to the continental U.S.


