
FREE SHIPPING ON ALL ORDERS TO THE CONTINENTAL U.S.
Jeep Wrangler JL Road and Wind Noise Fix That Actually Works

Jeep Wrangler JL Road and Wind Noise Fix That Actually Works

If your Jeep Wrangler JL gets loud at highway speed, you are not imagining it. Road noise and wind noise come through the floor, the doors, and the hardtop, and one product rarely fixes all three.

This guide shows how to treat a JL in layers. You will learn where the noise enters, which areas to tackle first, and which SoundSkins products fit each job. It is written for owners of the 2018 and newer Wrangler JL who want a quieter cabin without a full teardown.

Why the Jeep Wrangler JL is loud

Three areas carry most of the road noise into a JL cabin: the floor, the doors, and the roof. Each one is a large, thin sheet of metal. When tire vibration reaches it, the panel rings and turns into the drone you hear on the highway.

Wind noise comes from a different source. Air moving over the body, past the door seals, and along panel edges creates whistling and buffeting. Gaps and worn seals make it worse, so a good fix addresses both the panels and the openings.

For a broader look at how damping handles tire, wind, and exhaust noise, read Advantages of Sound Damping in Every Vehicle Explained.
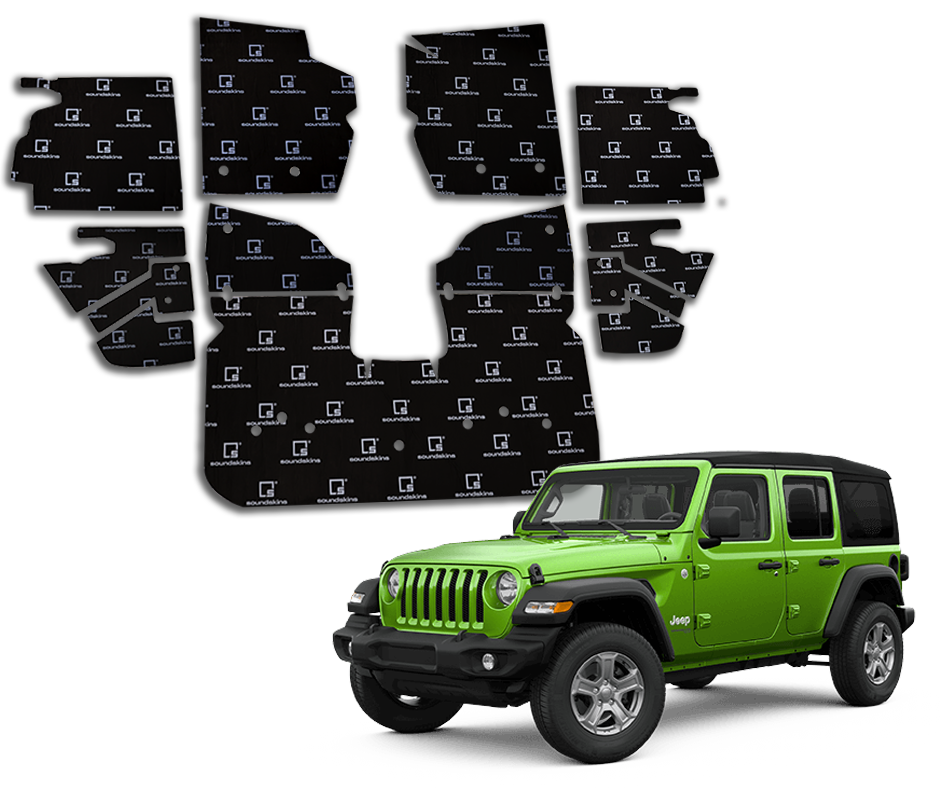
The fix that actually works

Work through the JL in this order: seals, floor, doors, then roof. Sound deadening adds weight and damping to metal, but it cannot close an air leak, so the seals come first.

  1. Check the seals. Inspect the door weatherstripping, the hardtop seals, and any gaps at the windshield and roof edges. The Bronco guide makes the same point: check weatherstripping and roof seals before adding material.
  2. Treat the floor. The floor pan is a large flat panel that carries tire roar up into the cabin. A butyl layer adds weight to the metal and damps its vibration.
  3. Treat the inner door panels. Treated doors cut side wind noise, reduce rattle, and improve speaker sound. The JL template kit covers the inner panels on all four doors.
  4. Treat the roof and hardtop. Hardtop panels can ring under wind and road vibration, and the Bronco guide recommends treating them for that reason. The JL kit does not cover the hardtop, so this step needs a separate roll.
  5. Add foam where airborne noise remains. Foam absorbs higher-pitched sound that travels through the air, which added mass alone will not stop. The advantages guide explains why foam and butyl do different jobs.

Recommended products

Every product below showed an Add to Cart button when checked on 9 November 2026. Stock can change, so recheck each page before publishing.

Product

What it covers

Size

Price (USD)

Pro Jeep Wrangler JL Template Kit

Inner door panels on all four doors, full floor pan, rear seat section

43 or 60 sq ft (see checklist)

$495.00

Pro Jeep Wrangler JL 4-Door Kit

Inner door panels on all four doors

21.5 sq ft

$344.00

Pro Plus Workshop Kit

Doors, front and rear footwells, trunk, roof behind the headliner

64.5 sq ft

$494.00

Classic Black Sound Deadening Roll

Outer doors, roof, floor pans

38.75 sq ft

$199.00

Wavy Foam Sound Deadening Kit

Closed-cell foam behind door panels, plus rattle control

32.3 sq ft

$89.00

SoundSkins Roller

Hand tool that presses material flat and removes air bubbles

Hand tool

$17.95

For a JL, the template kit handles the doors and floor in one order. Add the Classic Black roll or the Pro Plus kit for the hardtop, and use the Wavy Foam for rattles and airborne noise. The JL template kit page says kits are made to order, so allow time before shipping.
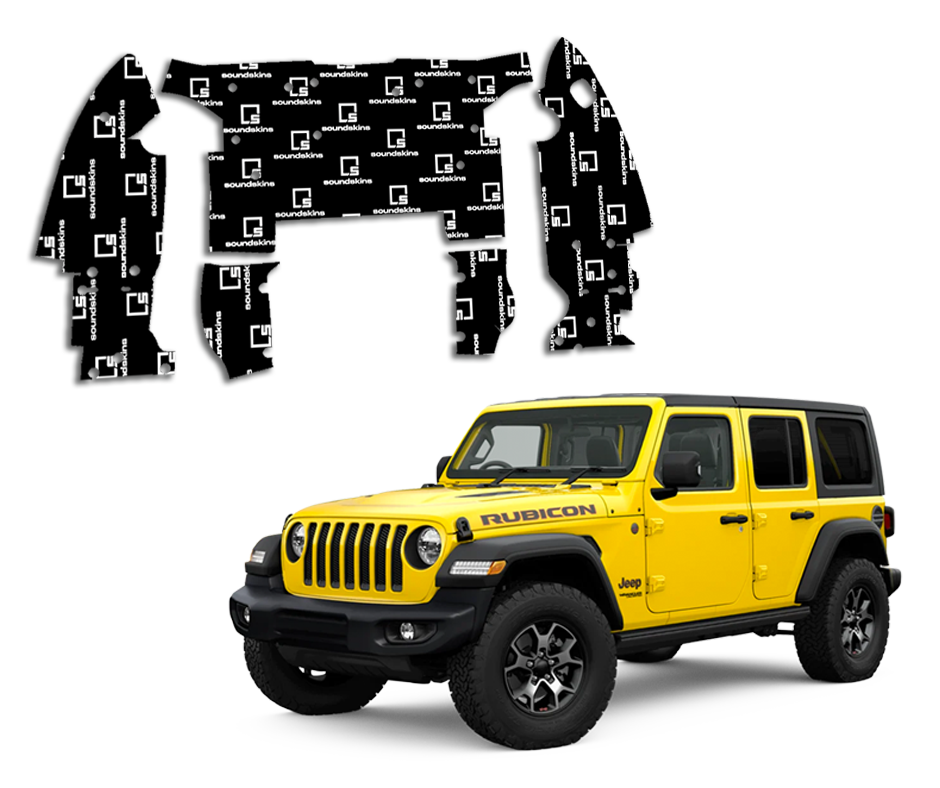
Install approach for floor, doors, and hardtop

Plan the job around access, because the floor and doors are hard to reach until the seats and trim come out. Work panel by panel and roll each piece before moving on.

  1. Plan the access. Expect to remove the seats, floor coverings, and trim to reach the floor. The removal guide describes the same access work when stripping old material.
  2. Clean the bare metal. Vacuum loose debris and wipe each panel before you press material on. Clean metal gives the butyl layer a better bond.
  3. Roll every piece. Press each piece flat with the SoundSkins Roller, working outward from the centre to push out air bubbles.
  4. Keep door openings clear. The window track, lock rods, and bottom drain holes must stay free of material, according to the Pro Door Kit page.
  5. Work on the hardtop off the vehicle. If you have removed the hardtop, lay it flat so you can reach every panel evenly.
  6. Handle old material with care. If old material is in place, follow the warnings in the removal guide: high heat can damage interior and electrical parts, and metal tools scratch surfaces.

FAQ

Will sound deadening fix wind noise on its own? Not if air leaks through worn seals. Check and replace weatherstripping first, then add material to the panels.

Does the JL kit cover the hardtop? No. The JL template kit covers the inner door panels, the floor pan, and the rear seat section. For the hardtop, add the Classic Black roll or the Pro Plus kit.

Which JL kit should I buy? Choose the template kit at $495.00 for doors and floor together. Choose the 4-Door Kit at $344.00 if you only want the doors treated.

Can I install it myself? Yes, if you have the time to pull the seats and trim. Access and cleaning matter more than tools, so follow the steps above.

Does the JL kit fit every model year? The product page describes the kit as suitable for 2018 and newer Wrangler JL models. The page title and URL say 2018 to 2022, so confirm the fit for your model year before ordering.

Conclusion

A quieter JL comes from layers, not one product. Seal the openings, treat the floor and doors with the JL template kit, then cover the hardtop with a roll and add foam where airborne noise remains.

For more on the same ideas, read Advantages of Sound Damping in Every Vehicle Explained, Best Sound Deadening Ideas for Ford Bronco Owners, and Toyota RAV4 Road Noise Fix for a Quieter Daily Drive. Ready to start? Shop the Pro Jeep Wrangler JL Template Kit.


Productos
Step 1

To install the material you need be working on the metal surface of the car, remove upholstery. If you have never done this, we suggest searching it up on YouTube. Once the upholstery is removed, make sure there is no debris, waxy oils or rust by cleaning the surface with denatured alcohol.

Step 2

Once surface is clean and ready to go, cut the sound deadening material to the right size so it fits desired area. For small surfaces, we recommend that you measure the dimensions and then cut to fit.

Step 3

With the surface area clean and pieces cut to desired dimensions, peel off the paper and apply material to surface area starting from the top to bottom using the car door holes to help with alignment. We recommend using a hand roller to ensure that there are no air pockets and ensure the adhesiveness.

Sound Deadener Install On Jeep

SOUNDSKINS GLOBAL

Related Products

Shop now

Sound Deadener Install FAQ: Tips & Tricks

What tools will I need to for a sound deadening project?  
  • Rag & Denatured Alcohol: Apply the alcohol to the rag and use to clean the metal surface areas you will be applying the material to.
  • Gloves: Our product is pretty safe to install without gloves but if you have never installed a sound deadener mat, we recommend using gloves.
  • Hand roller: We highly recommend using a small roller to reach the tighter surface areas of your vehicle. You can find these on Amazon or most online retail shops. There are wooden, rubber and metal rollers, we recommend wooden or rubber, try and stay away from metal as they can tear the material.
  • Utility Knife: The utility blade is to cut the material. Make sure to cut the material on top of a pice of cardboard so that your blade stays sharper longer, if it's a big job, have some extra blades around.
How do you apply sound deadener material? 

We sell our roll on sound deadener product in 2 different formats: custom cut to fit pro kits and an easy to work with rolled up large sheet. If you can measure, cut, peel and stick you can install sound deadener! You can use your hand to apply pressure when positioning the material and then use a roller to make sure it sticks down to metal surface.

After you cut the material and are ready to stick it on, some customers find it easier to peel off a small portion of the release liner and then apply it to metal surface, and then work their way across the sheet, peeling off a small section at a time.

Make sure to always remove the air bubbles with the roller. The second most important thing when it comes to quality of sound deadener is the quality of adhesion to the surface area. You want the material to be stuck down properly to ensure it stays in place.

Where do you apply the sound deadening material?  

The great thing about our sound deadening material is that it can be applied to all types of metal surfaces. All SoundSkins sheets use extremely strong adhesive and they can even be mounted on fiberglass, plastic and even wooden surfaces, but it's not very common to apply to these surfaces since they don't vibrate as much. By covering all metal surfaces such as your doors, roof, trunk and floor you can make a significant difference to unwanted road noise.

Your top priority when applying a car sound deadener is to cover the doors, floor and trunk. If you have extra material then proceed to other metal surfaces you wish to cover for extra sound insulation.

How much surface area should I cover?  

To properly deaden the metal surfaces, we recommend to at least do 25% coverage with our SoundSkins material, this will make a difference in unwanted road noise, but to have a huge impact we recommend covering up 60% of metal surfaces. If you want to get the most used from your sheet, one effective strategy is the CHECKER BOARD APPROACH, using this technique you cut the SoundSkins sheet into small pieces and apply them to the metal surface in a checkered pattern.

It is very common for our customers to do close to 100& coverage to any metal surface because not only are they looking to reduce road noise, they also want to insulate their car from heat or they like the way the material looks on the car's bare metal surface.

How do I make sure the sound deadener sticks well?

SoundSkins products are made with a very strong adhesive and create a extremely strong bond with the metal, it's really hard to NOT make it stick. To ensure the best possible bond, we highly recommend cleaning the metal surface before applying our material and then using a hand roller to firmly attach the SoundSkins deadening mats.

Great adhesion with no air bubbles is the absolute key if you want to get the best performance. Remember that any air pocket with poor adhesion means you will not get the full benefit of the deadener.

How to install car sound deadener: Recap
  1. Remove upholstery and carpet from your vehicle. Proceed to vacuum to get rid of debris and dirt. Clean all greasy spots with denatured alcohol, other solvents or degreasers will leave behind a film that prevents a solid contact surface. Allow metal surface to try.
  2. Cut the SoundSkins sheet to desired size and cut using a sharp utility knife. Use gloves to avoid any cuts.
  3. Peel off the wax paper from the back of material and apply to surface, this can be done by small sections at a time. Use roller to create a strong bond between material and metal surface and to get rid of any air bubbles.

If you have any questions, make to reach out to use and we'll be happy to help.

SOUNDSKINS GLOBAL