


A Ford Super Duty is built to tow, haul, and work hard. The factory sound system is not. Most F-250 and F-350 owners notice it within a few weeks. The bass is thin, the low notes vanish when the diesel is pulling, and turning up the volume only makes the door panels buzz.
Bass is the fix, but it has to be installed the right way. A Super Duty cab is big, but the space you can actually use for a subwoofer is small and oddly shaped. A generic square box from a big box store either will not fit, eats your back seat, or rattles loose on the first gravel road.
Why the Super Duty Needs a Truck Specific Subwoofer Enclosure
A universal box is designed for a car trunk. A Super Duty has no trunk. Your options are the space under the rear seat on a Crew Cab, or the thin gap between the rear seat and the back wall of the cab.
That changes everything about the enclosure:
- Shape. The box has to follow the floor and the back wall, not a simple rectangle.
- Depth. Behind-seat locations give you only a few inches, so the box and the sub must both be shallow.
- Air space. A box squeezed into a small space still needs enough internal volume for the sub to play deep.
- Durability. Work trucks see dust, mud, tools, and boots. Raw carpet-covered boxes tear and soak up moisture.
A truck specific enclosure solves all four. You keep your seating, your cab looks factory, and the sub gets the air space it was designed for.
Know Your Super Duty Generation First
Fitment is driven by the cab design, so start here.
| Generation | Model Years | What Changes for Sub Boxes |
|---|---|---|
| Older Super Duty | 2000 to 2016 | Behind-seat boxes, rear power window motor can affect fitment |
| 4th Gen | 2017 to 2022 | New aluminum body cab, under-seat and behind-seat options |
| 5th Gen | 2023 and newer | Same cab footprint as 4th Gen, but B&O audio and Pro Power Onboard affect behind-seat installs |
Every 2017+ enclosure below fits both 4th and 5th Gen trucks, which makes the newer Super Duty one of the easiest trucks to upgrade.
Under Seat vs Behind Seat Subwoofer Boxes
This is the biggest decision for an F-250 or F-350 owner.
Under Seat Subwoofer Boxes (Crew Cab)
On a Crew Cab, the area under the rear bench is the best spot in the truck for bass. These enclosures sit on the floor and fire the subs downward into the cab floor. The floor acts as a loading surface, which helps bass build up and spread through the cabin.
Best for: Crew Cab owners who want the most output with dual 10s, dual 12s, or quad 10s.
Trade-off: Under-seat storage is replaced by the box.
Behind Seat Subwoofer Boxes
Behind-seat boxes mount between the rear seat and the back wall of the cab. They are slim, hidden, and leave the under-seat area free.
Best for: Owners who want clean, hidden bass and still need under-seat storage, or trucks where the under-seat area is already used.
Trade-off: Very shallow mounting depth, so you need slim or shallow-mount subwoofers.
Best F-250 and F-350 Subwoofer Boxes for 2017 and Newer Trucks
All of these enclosures are made in the USA from full 3/4" MDF and finished with a bed liner polymer spray, which holds up far better than carpet in a work truck.
Single 10" Behind the Seat, the Entry Point
The Ford F-250 / F-350 / F-450 Super Duty 2017+ Single 10" Subwoofer Enclosure is the simplest way to fix weak factory bass.
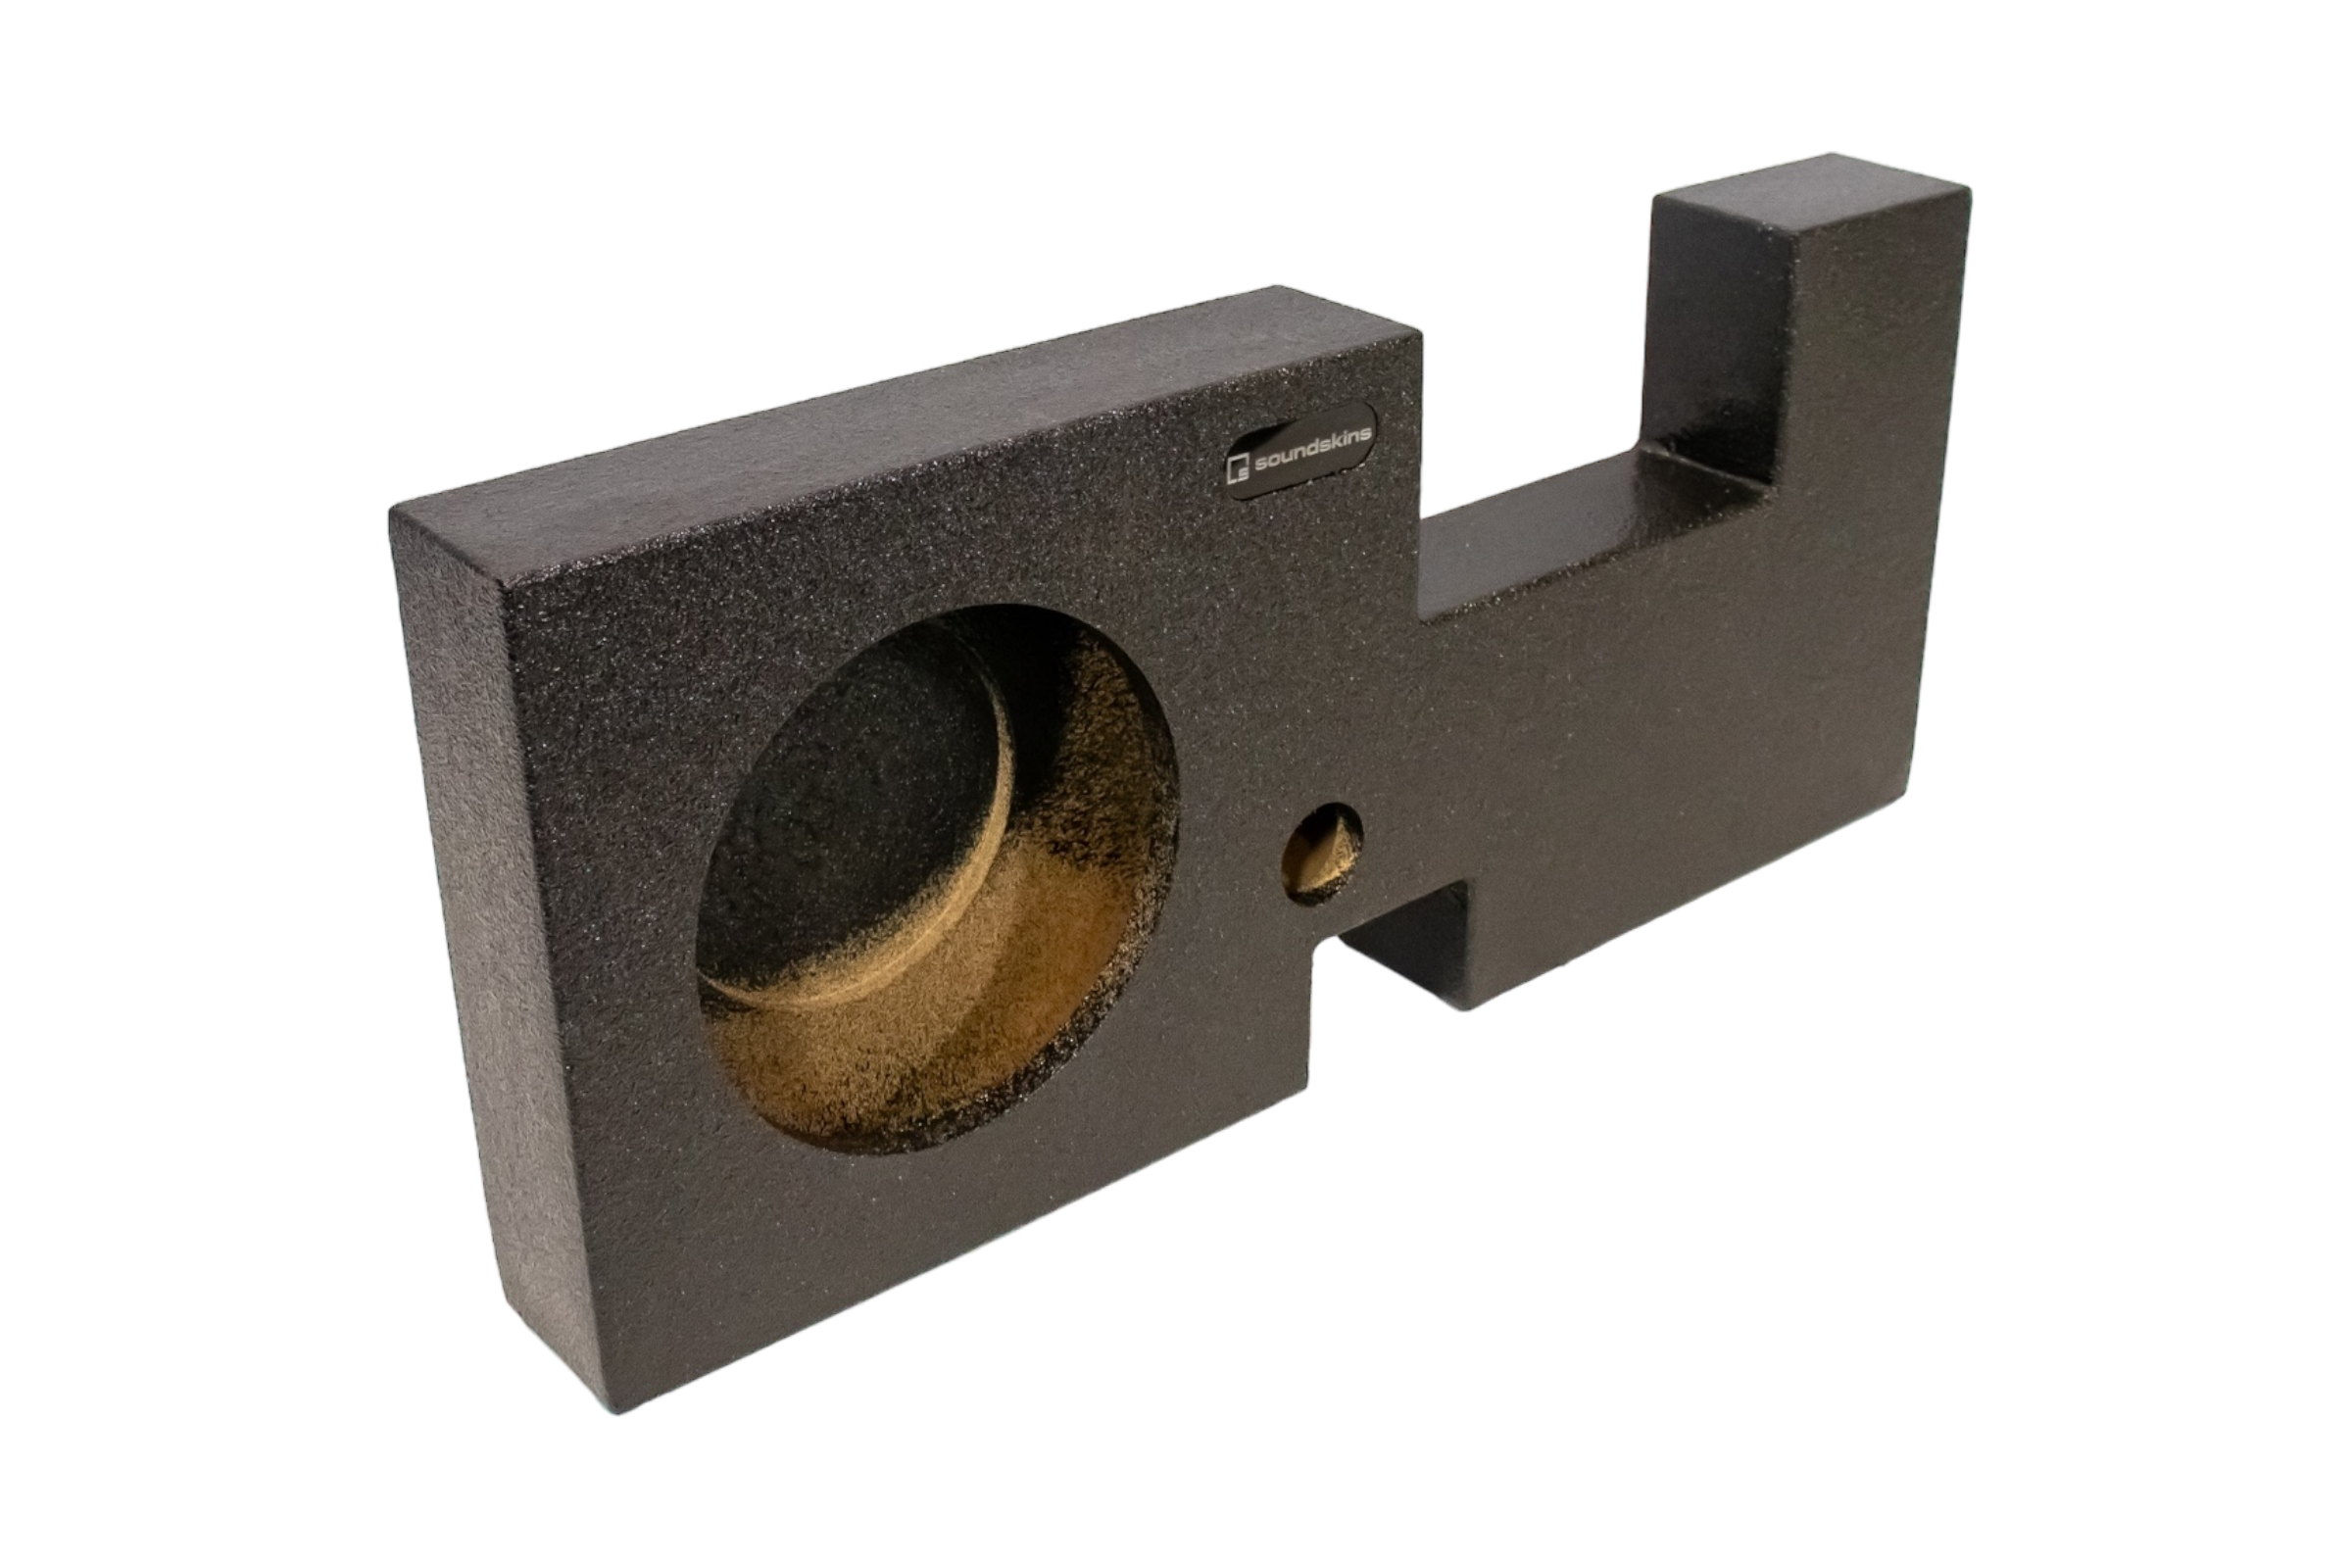
- Sealed design, mounts behind the rear seat
- 33" wide, 14" tall, only 3.75" deep
- 0.4 ft³ air space, 3.5" mounting depth
- Price: $249
Choose this if you want tight, clean low end that fills in what the factory speakers are missing, without making the truck feel like a show build.
Dual 10" Behind the Seat, Hidden Bass With More Punch
The Ford F-250 / F-350 / F-450 Super Duty 2017+ Dual 10" Behind The Seat Enclosure doubles the cone area while staying out of sight.
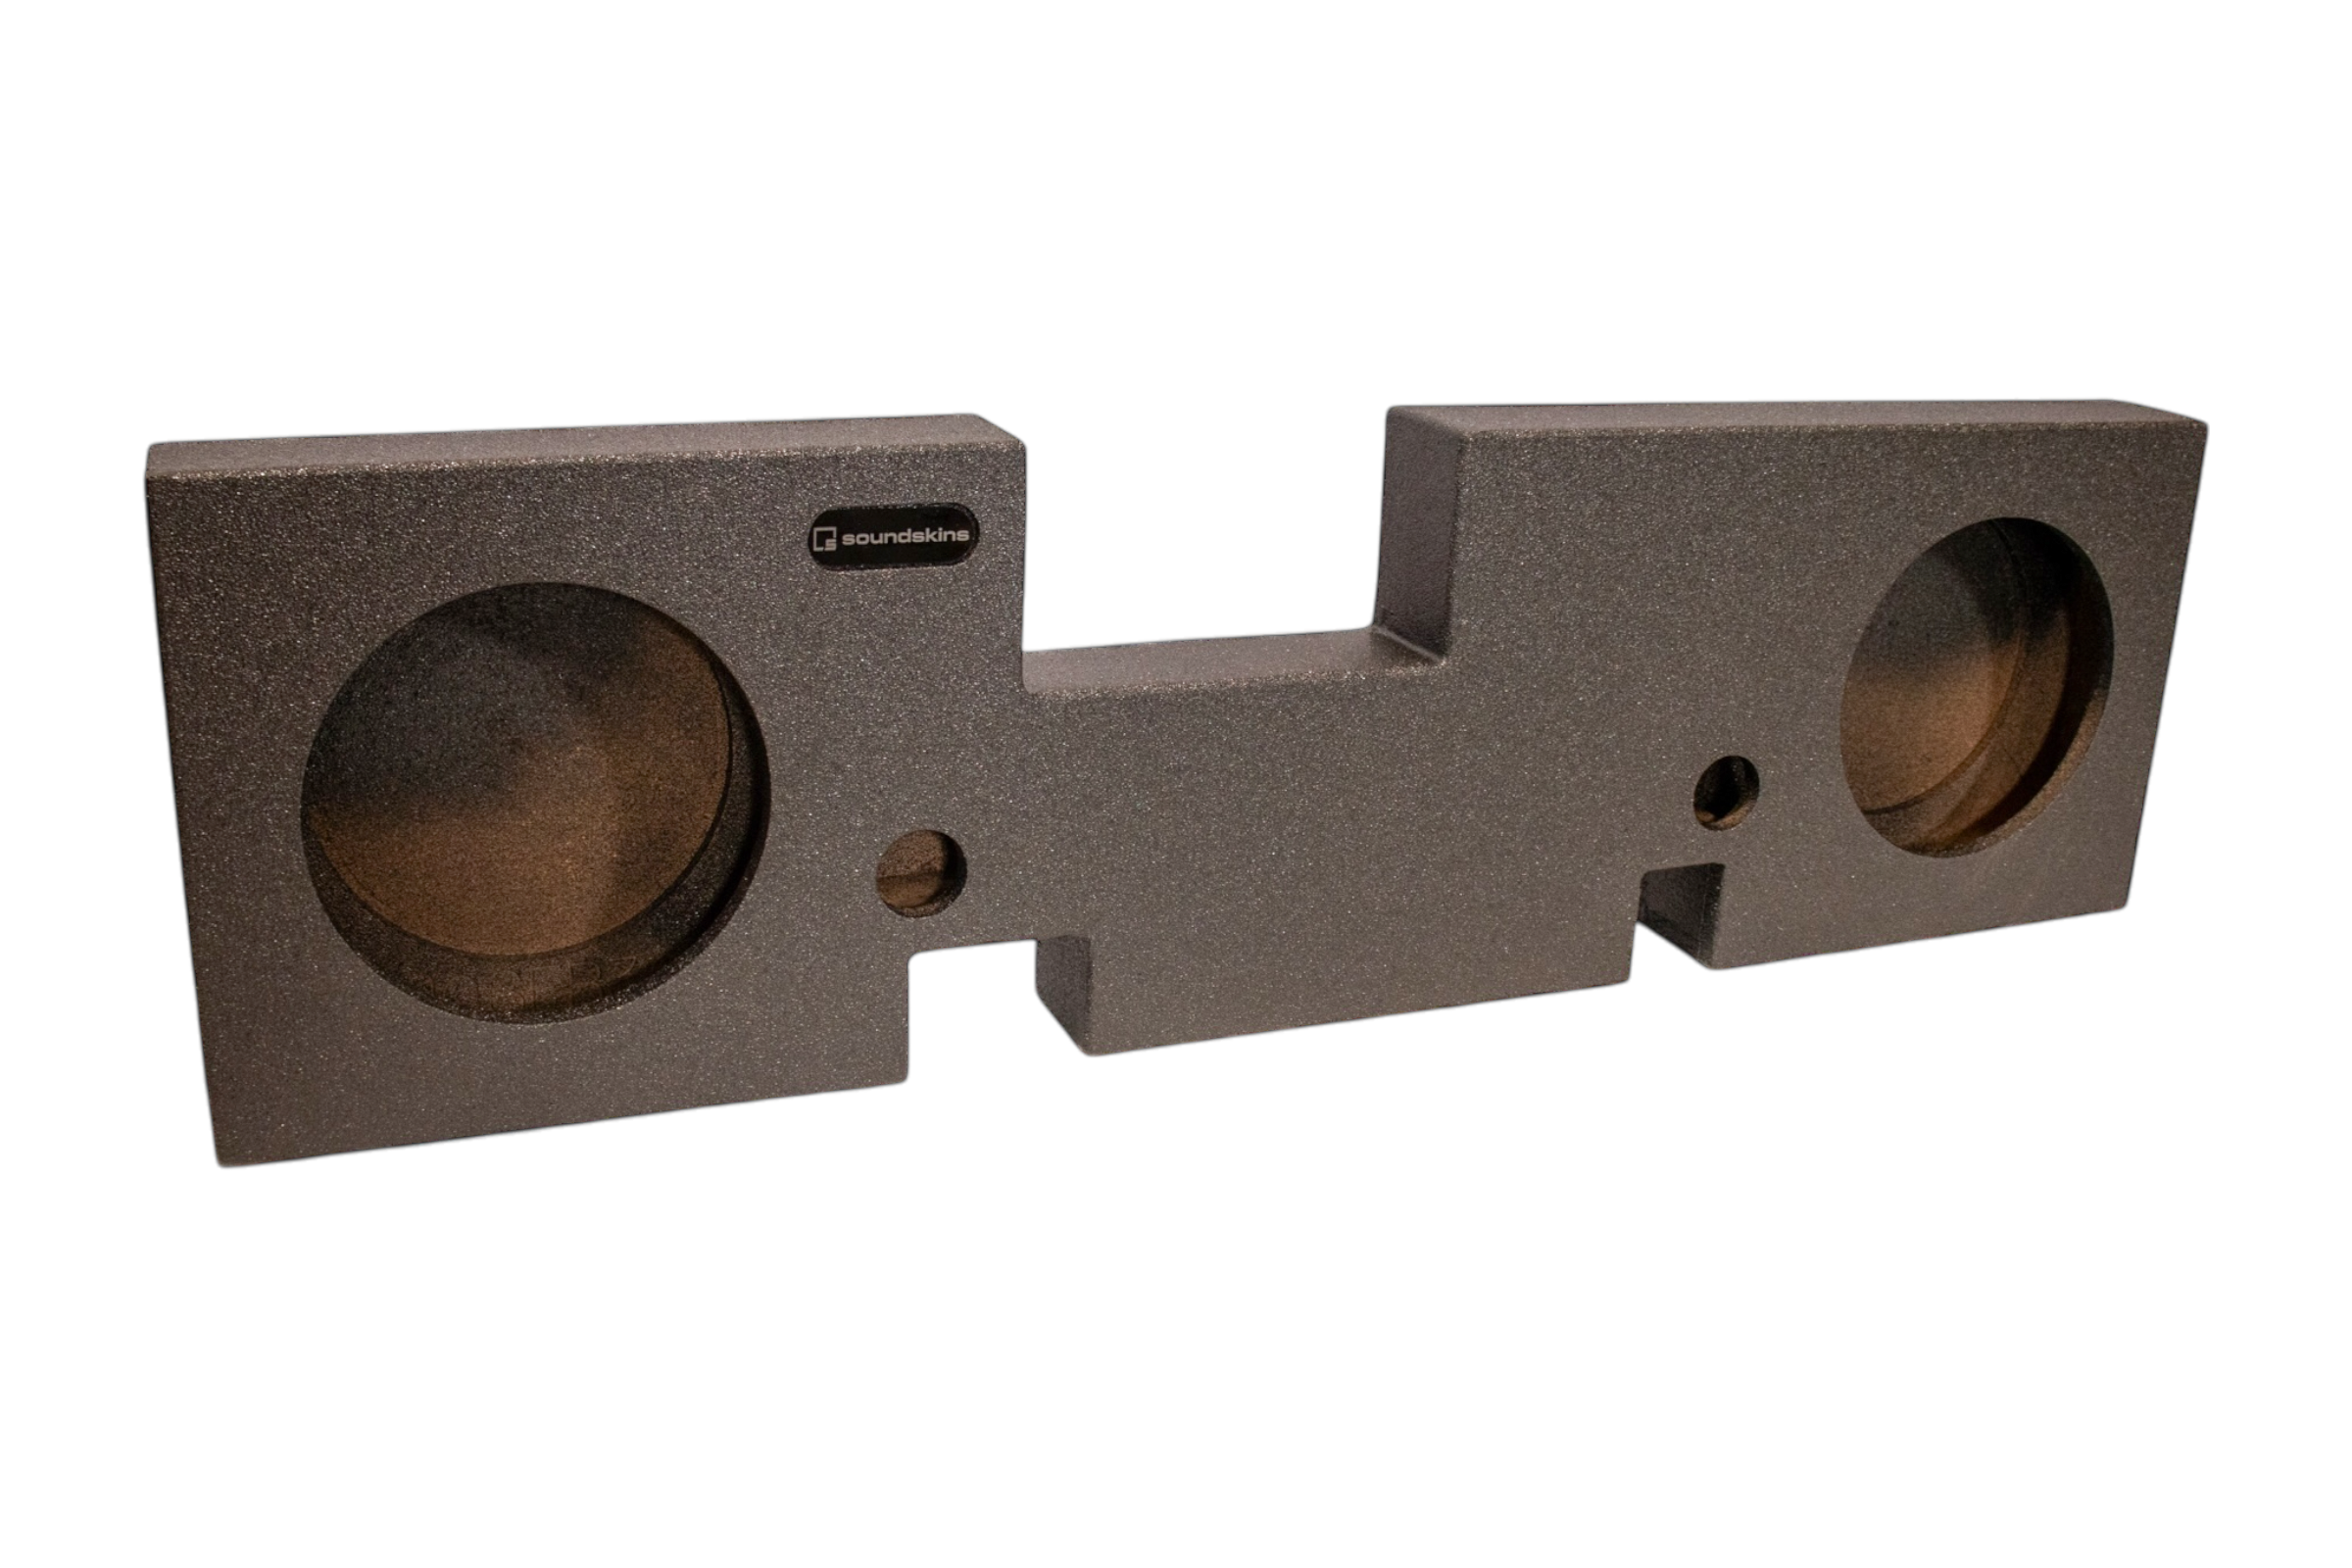
- Sealed, 50" wide, 14" tall, 3.75" deep
- 1 ft³ total air space, 3.5" mounting depth
- Price: $409
This is the sweet spot for owners who want real bass and a completely stock looking cab. Pair it with two shallow-mount 10s and a modest amp and the difference is huge.
Important Note: Behind-seat boxes on 2017+ Super Duty trucks require relocating the OEM jack and jack holder, and removing or trimming the back wall paneling. 5th Gen trucks with the B&O system need the factory amp relocated. Trucks equipped with the 2.0kW Pro Power Onboard system are not compatible with behind-seat enclosures due to clearance, so go with an under-seat box instead.
Dual 10" Under Seat Options for Crew Cab
For Crew Cab owners who want more than a behind-seat setup can deliver, the under-seat dual 10 boxes step it up.
- Dual 10" Super Duty 2017+ Enclosure, from $399
- Dual 10" Deluxe Ported, from $449
- Dual 10" Deluxe Sealed, from $449
10s respond quickly and stay articulate, which makes them a great match for rock, country, and anything with fast kick drums.
Dual 12" Sealed, the Most Popular F-250 Crew Cab Sub Box
The Ford F-250 / F-350 / F-450 Super Duty 2017+ Dual 12" Enclosure is the go-to choice for most Crew Cab owners.
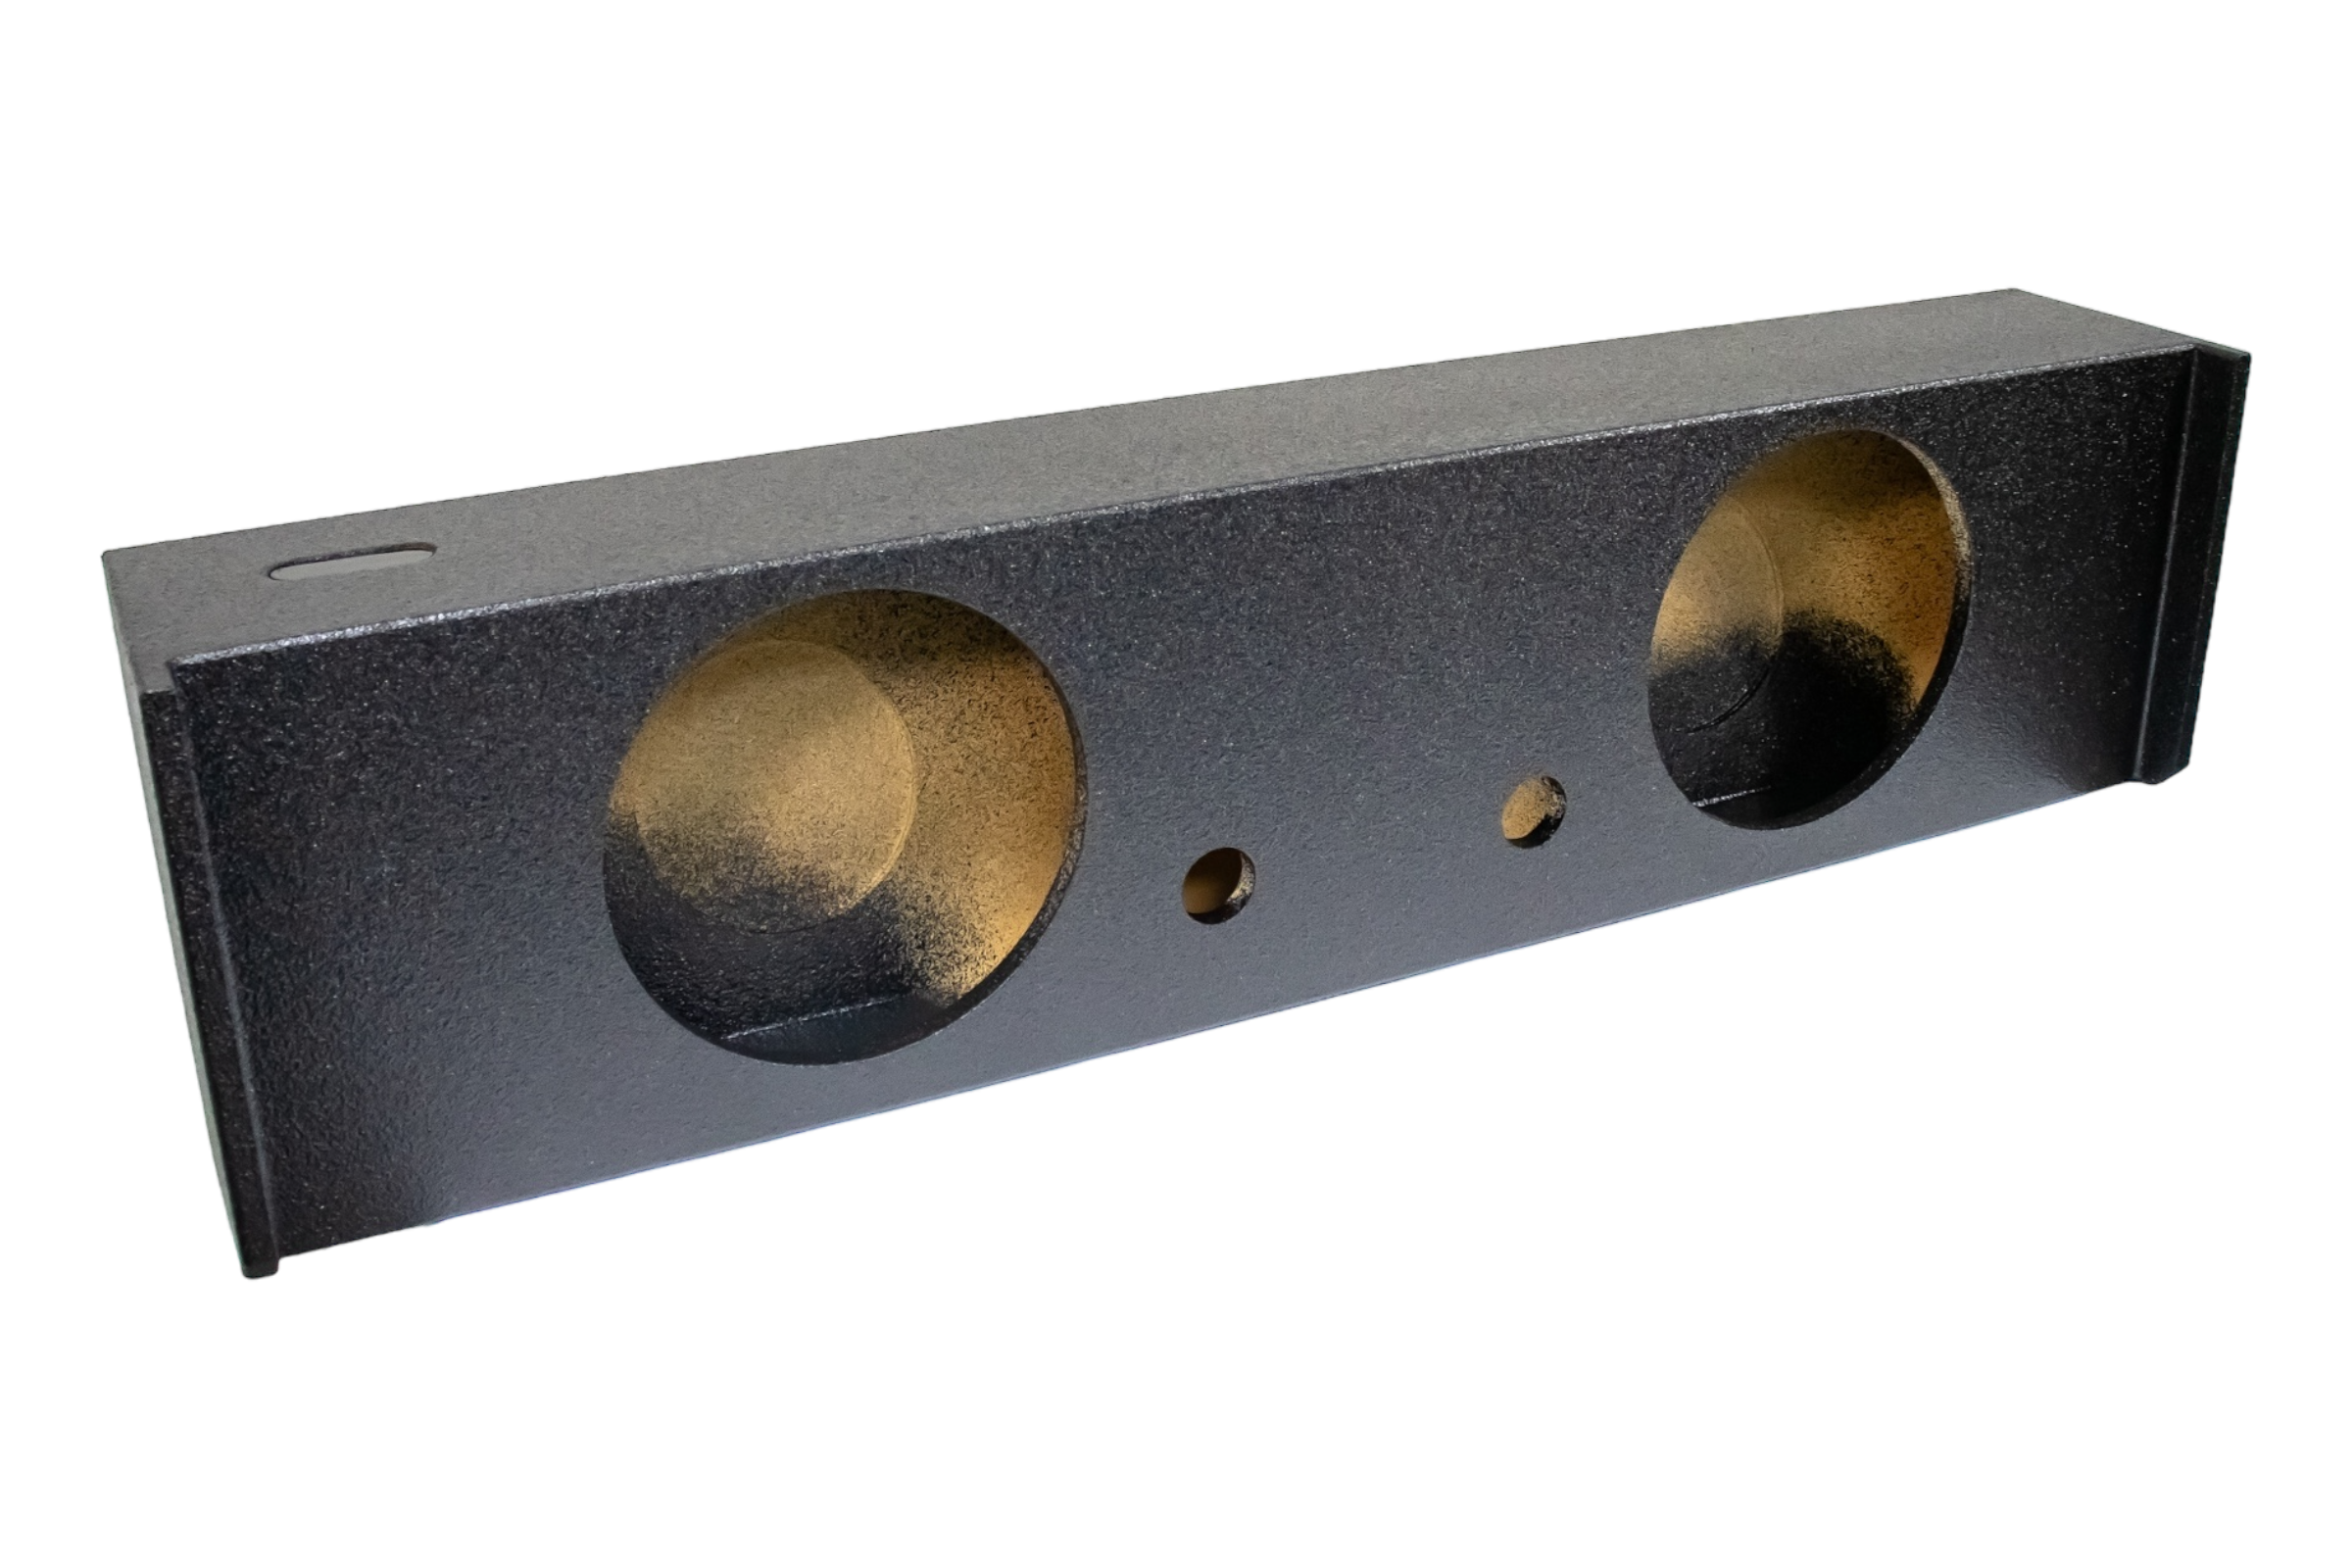
- Sealed, down-fire design
- 55" wide, 9" tall, 14" deep
- 1.5 ft³ air space, 5.35" mounting depth, 11.125" cutout
- Kicker Solo-Baric specific version available
- Price: from $399
Sealed 12s give you deep, controlled bass that sounds musical at any volume. This is the box for owners who want their truck to sound like a premium audio system, not a parking lot competition rig.
Dual 12" Deluxe Ported, Maximum Output
If you want the bass to hit hard, the Ford F-250 / F-350 / F-450 Super Duty 2017+ Dual 12" Deluxe Ported Enclosure is the top pick.
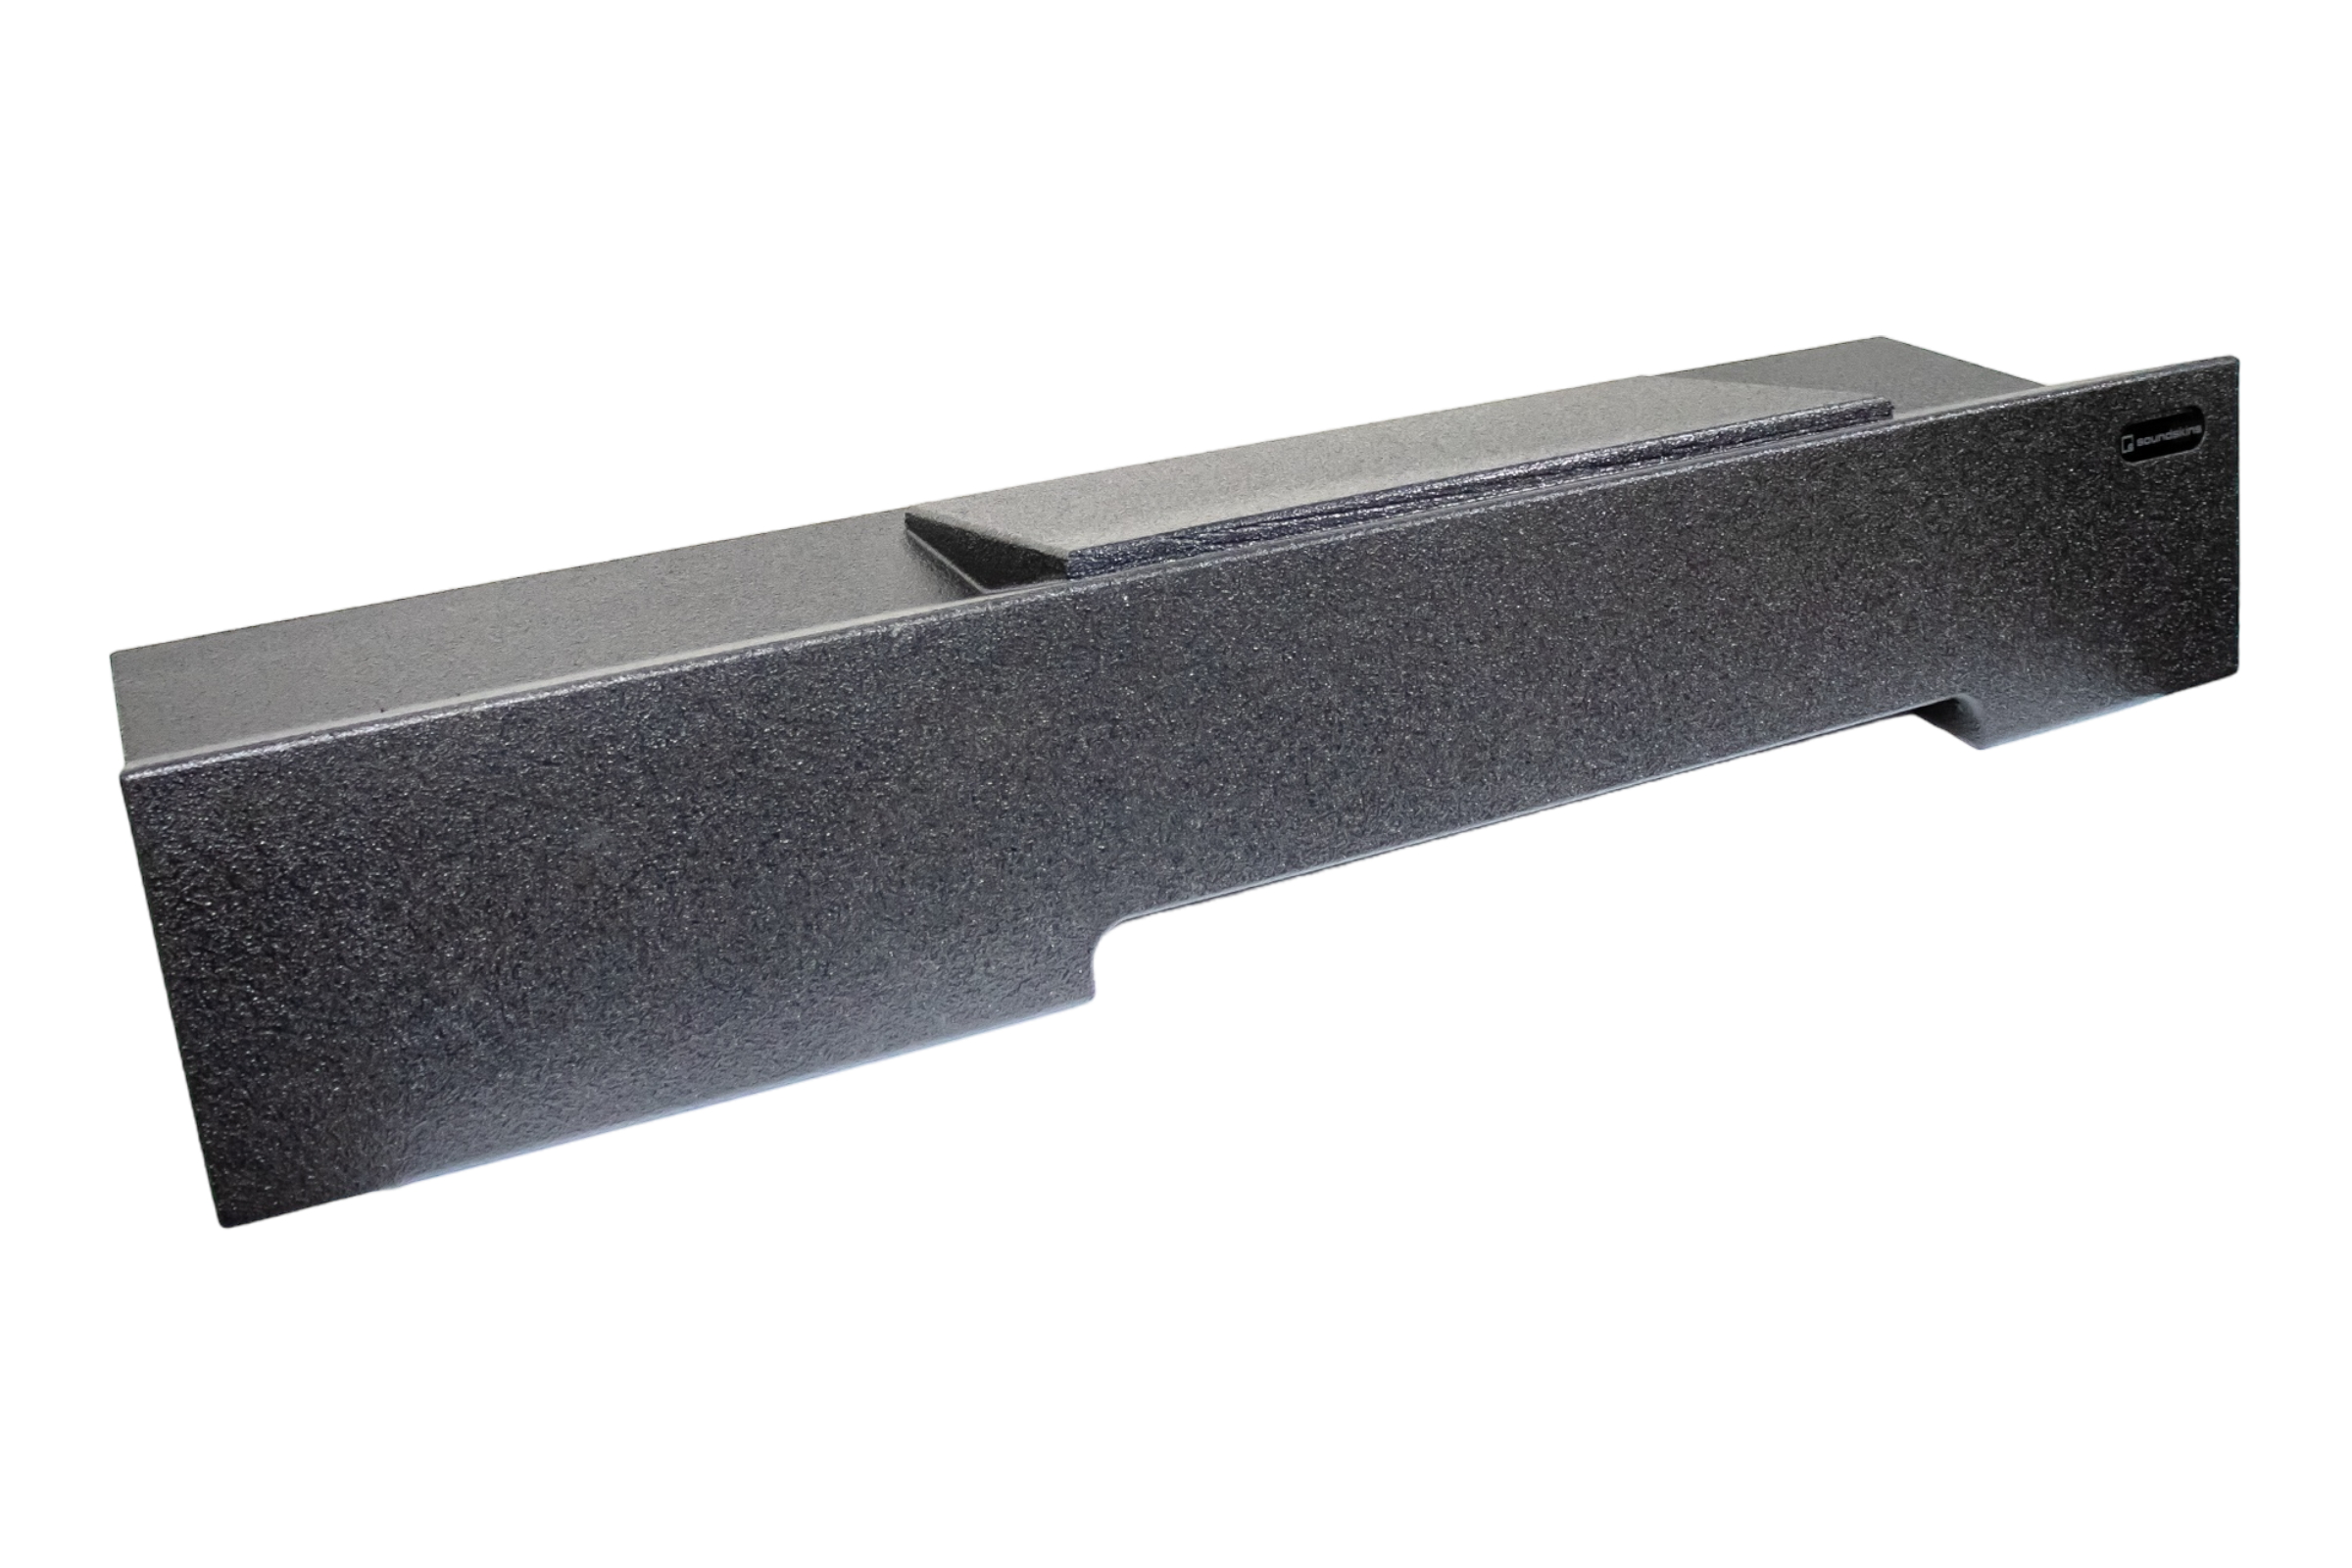
- Crew Cab down-fire, deluxe air space
- 53.25" wide, 8.75" tall, 14.5" deep
- 2 ft³ air space, tuned to 39Hz (Kicker version 1.85 ft³ at 42Hz)
- 5" mounting depth
- Price: from $449
The extra air space is built for powerful subs, and the 39Hz tuning brings out the deep notes in hip-hop, EDM, and bass-heavy country. A Dual 12" Deluxe Sealed version is also available for owners who want deluxe air space with sealed accuracy.
Quad 10" and Quad 8" for Serious Builds
For owners who want a wall of bass under the rear seat:
- Super Duty 2017+ Quad 10" Sealed with 1.5 ft³ of air space, from $399
- Super Duty 2017+ Quad 8" Ported Double Baffle, from $399
Four smaller subs move a lot of air quickly, giving you fast, punchy bass with impressive total output.
Best Sub Boxes for 2000 to 2016 Super Duty Trucks
Older F-250 and F-350 trucks are still everywhere, and they deserve good bass too. These enclosures mount behind the rear seat with a cutout for the rear window motor.
- Dual 12" Ported, 2000 to 2016, 1.05 ft³ tuned to 40Hz, 4.25" mounting depth, from $399
- Dual 12" Sealed, 2000 to 2016, from $399
- Dual 10" Ported, 2000 to 2016, from $399
- Dual 10" Sealed, 2000 to 2016, from $399
Installation means removing the factory plastic tray, the rear wall carpet or paneling, and the jack kit. On trucks with a rear power window, the motor may need to come out, so confirm the exact version for your truck before ordering.
Sealed vs Ported for an F-250 or F-350
Both work well in a Super Duty. The choice depends on what you listen to.
| Sealed | Ported | |
|---|---|---|
| Sound | Tight, accurate, musical | Louder, deeper, more boom |
| Best music | Rock, country, metal, jazz | Hip-hop, EDM, rap, bass-heavy country |
| Power needed | More | Less for the same volume |
| Size | Smaller for the same sub | Larger due to port |
A diesel Super Duty also has its own low frequency engine and road noise. Ported boxes cut through that noise more easily at highway speed, while sealed boxes sound cleaner in a quieter truck.
How to Pick the Right Super Duty Subwoofer Box
Answer these four questions and the choice becomes obvious.
- What year is your truck? 2000 to 2016 or 2017 and newer.
- What cab? Crew Cab opens up the under-seat options.
- Do you need under-seat storage? If yes, go behind the seat.
- Clean bass or loud bass? Sealed for clean, ported or deluxe for loud.
Quick picks:
- Stock look, better sound: Single 10" behind seat
- Hidden bass with real punch: Dual 10" behind seat
- Best all-around Crew Cab upgrade: Dual 12" sealed
- Hardest hitting option: Dual 12" deluxe ported
Pro Tip: Always check the subwoofer's mounting depth against the box spec before you buy. Behind-seat boxes allow just 3.5", and the 2017+ dual 12 boxes allow around 5". A sub that is even half an inch too deep will not fit, and that is the most common mistake Super Duty owners make.
Don't Skip the Terminal Cup Upgrade
Most under-seat Super Duty boxes offer an upgraded SMD TCR-1 terminal cup. The standard cup handles around 500 watts. The SMD cup supports up to 2000 watts, uses stainless steel hardware, and has a 5/16" bolt terminal.
If you are running a serious amp, this small upgrade keeps your connections solid and prevents air leaks that can rob the box of output.
Sound Deadening Makes Your Sub Sound Twice as Good
Here is something most truck owners learn the hard way. You install a great sub, turn it up, and suddenly the rear cab wall, doors, and roof start buzzing. Super Duty cabs have large, thin metal panels that vibrate under bass. That rattle covers up the bass you just paid for.
Sound deadening fixes this. It stops panel vibration, lowers road and diesel noise, and lets the bass sound clean and full. A quieter cab also means you do not need as much volume to hear detail.
For the Super Duty, the easiest way is a pre-cut kit made for your truck:
- 2023+ Ford Super Duty 4-Door Sound Deadening Vehicle Specific Kit, 30 sq ft, 3-layer construction with acoustic foam, foil, and rubber butyl, $379
- 2023+ Ford Super Duty 2-Door Sound Deadening Vehicle Specific Kit, 16 sq ft, $279
Pro Tip: Install the sound deadening on the rear cab wall and doors while the back panels are already off for the sub box install. You save hours of labor by doing both jobs at the same time, and the rear wall is exactly where bass rattle starts in a Super Duty.
If you want to see how much difference deadening makes, this guide on how to measure cabin noise before and after sound deadening shows a simple way to test it. And if a buzz shows up after the install, here is how to find the exact spot causing a car interior rattle.
Basic Install Steps for a Super Duty Sub Box
Every truck and box is slightly different, but most installs follow this order.
- Disconnect the battery before touching any wiring.
- Remove the rear seat or fold it up to access the mounting area.
- Clear the space. Remove or relocate the jack kit, trays, and back wall panels as needed. On 5th Gen B&O trucks, relocate the factory amp.
- Add sound deadening to the exposed rear wall and floor.
- Run power wire from the battery through the firewall with an inline fuse near the battery.
- Mount the amplifier in a spot with airflow.
- Mount the subs in the box and wire them to your target impedance.
- Secure the enclosure so it cannot shift during braking or off-road driving.
- Set the amp gain and crossover carefully, starting low.
- Reinstall the seat and test at low volume first, then increase gradually.
Make the Whole System Sound Better
The sub handles the low end, but your door speakers handle the mid-bass and vocals. If those doors are rattling, the system will still sound unbalanced. Many of the same door treatment ideas in this F-150 speaker upgrade sound deadening guide apply directly to the Super Duty, since both trucks use similar large door panels.
A full system upgrade usually looks like this:
- Sound deadening on doors and rear wall
- A truck specific sub box with quality subs
- A properly matched amplifier
- Upgraded door speakers
Do it in that order and every part of your system performs better than it would on its own.
Frequently Asked Questions
What is the best subwoofer box for an F-250 Crew Cab?
For most owners, the dual 12" sealed under-seat enclosure is the best overall pick. It gives deep, controlled bass and fits cleanly under the rear seat. If you want maximum output, step up to the dual 12" deluxe ported.
Can I fit a subwoofer box under the seat of my F-250?
Yes. Crew Cab Super Duty trucks have room under the rear bench for dual 10, dual 12, and quad 10 down-fire enclosures.
Will a 2017 F-250 sub box fit a 2023 F-250?
Yes. The 2017+ enclosures fit both the 4th Gen (2017 to 2022) and 5th Gen (2023+) Super Duty. On 5th Gen trucks with the B&O system or Pro Power Onboard, check the fitment notes for behind-seat boxes.
Do F-250 and F-350 use the same sub box?
Yes. The F-250, F-350, and F-450 share the same cab, so the same enclosure fits all three within the same generation.
Do I need shallow subwoofers for a Super Duty?
For behind-seat boxes, yes. They allow only about 3.5" of mounting depth. Under-seat boxes allow around 5" to 5.35", which fits many standard subs.
Will a sub box remove my rear seat?
No. Truck specific boxes are designed to fit under or behind the seat, so you keep full seating.
Do I need sound deadening with a subwoofer?
It is not required, but it makes a big difference. Super Duty cabs have large panels that rattle with bass. Deadening removes that noise and makes the bass sound cleaner and louder.
Final Thoughts
Your Super Duty is built to work, but there is no reason it should sound basic. A truck specific subwoofer box keeps your seating, fits the cab like it came from the factory, and finally gives your system the low end it has been missing.
Start with your generation and cab, decide between under seat and behind seat, then pick sealed or ported based on how you listen. Add sound deadening to the rear wall and doors, and you will have a Super Duty that sounds as strong as it drives.
Shop all Ford subwoofer enclosures at SoundSkins Global and get free shipping on all orders to the continental U.S.


