


The Jeep Gladiator does almost everything well. It crawls rocks, tows real weight, and drops its roof and doors when the weather turns good. Sound quality is where it falls short. Once you hit 60 mph with the soft top on, or pull the roof panels for a summer drive, the factory system loses its low end. Bass gets lost under the tire hum, the wind, and the open cabin.
A subwoofer is the most effective fix. In the Gladiator, the best place for one is already built into the truck: the space under the rear seat.
Why the Gladiator Loses Bass So Easily
The Gladiator has some features that work against good audio.
- Removable roof and doors. Bass needs a sealed space to build pressure. When the top is off, low notes escape instead of filling the cab.
- Aggressive tires. All-terrain and mud tires create low frequency road noise that covers up the same range bass lives in.
- Upright windshield and flat panels. Wind noise at highway speed is louder than in most trucks.
- Small factory speakers. Door and dash speakers cannot reproduce deep bass on their own, regardless of how much volume you add.
A dedicated subwoofer in the right enclosure handles the low end so your factory or upgraded speakers can focus on vocals and detail. The result is fuller, clearer sound at every volume, with the top on or off.
Why Under Seat Is the Best Spot for a Gladiator Subwoofer
The Gladiator is a crew cab only truck, and the rear bench folds up to reveal a storage area underneath. That space is ideal for a sub box.
- No lost seating. Rear passengers keep full use of the bench.
- Hidden install. With the seat down, nobody sees the box.
- Bed stays free. Unlike a box mounted in the bed or behind the cab, nothing is exposed to weather or theft.
- Close to the listener. Bass from under the seat reaches the whole cab evenly.
The catch is size. The under seat area is wide but shallow, so a generic box from a parts store will not fit. A Gladiator specific enclosure is built to match the floor shape and sit flat under the seat.
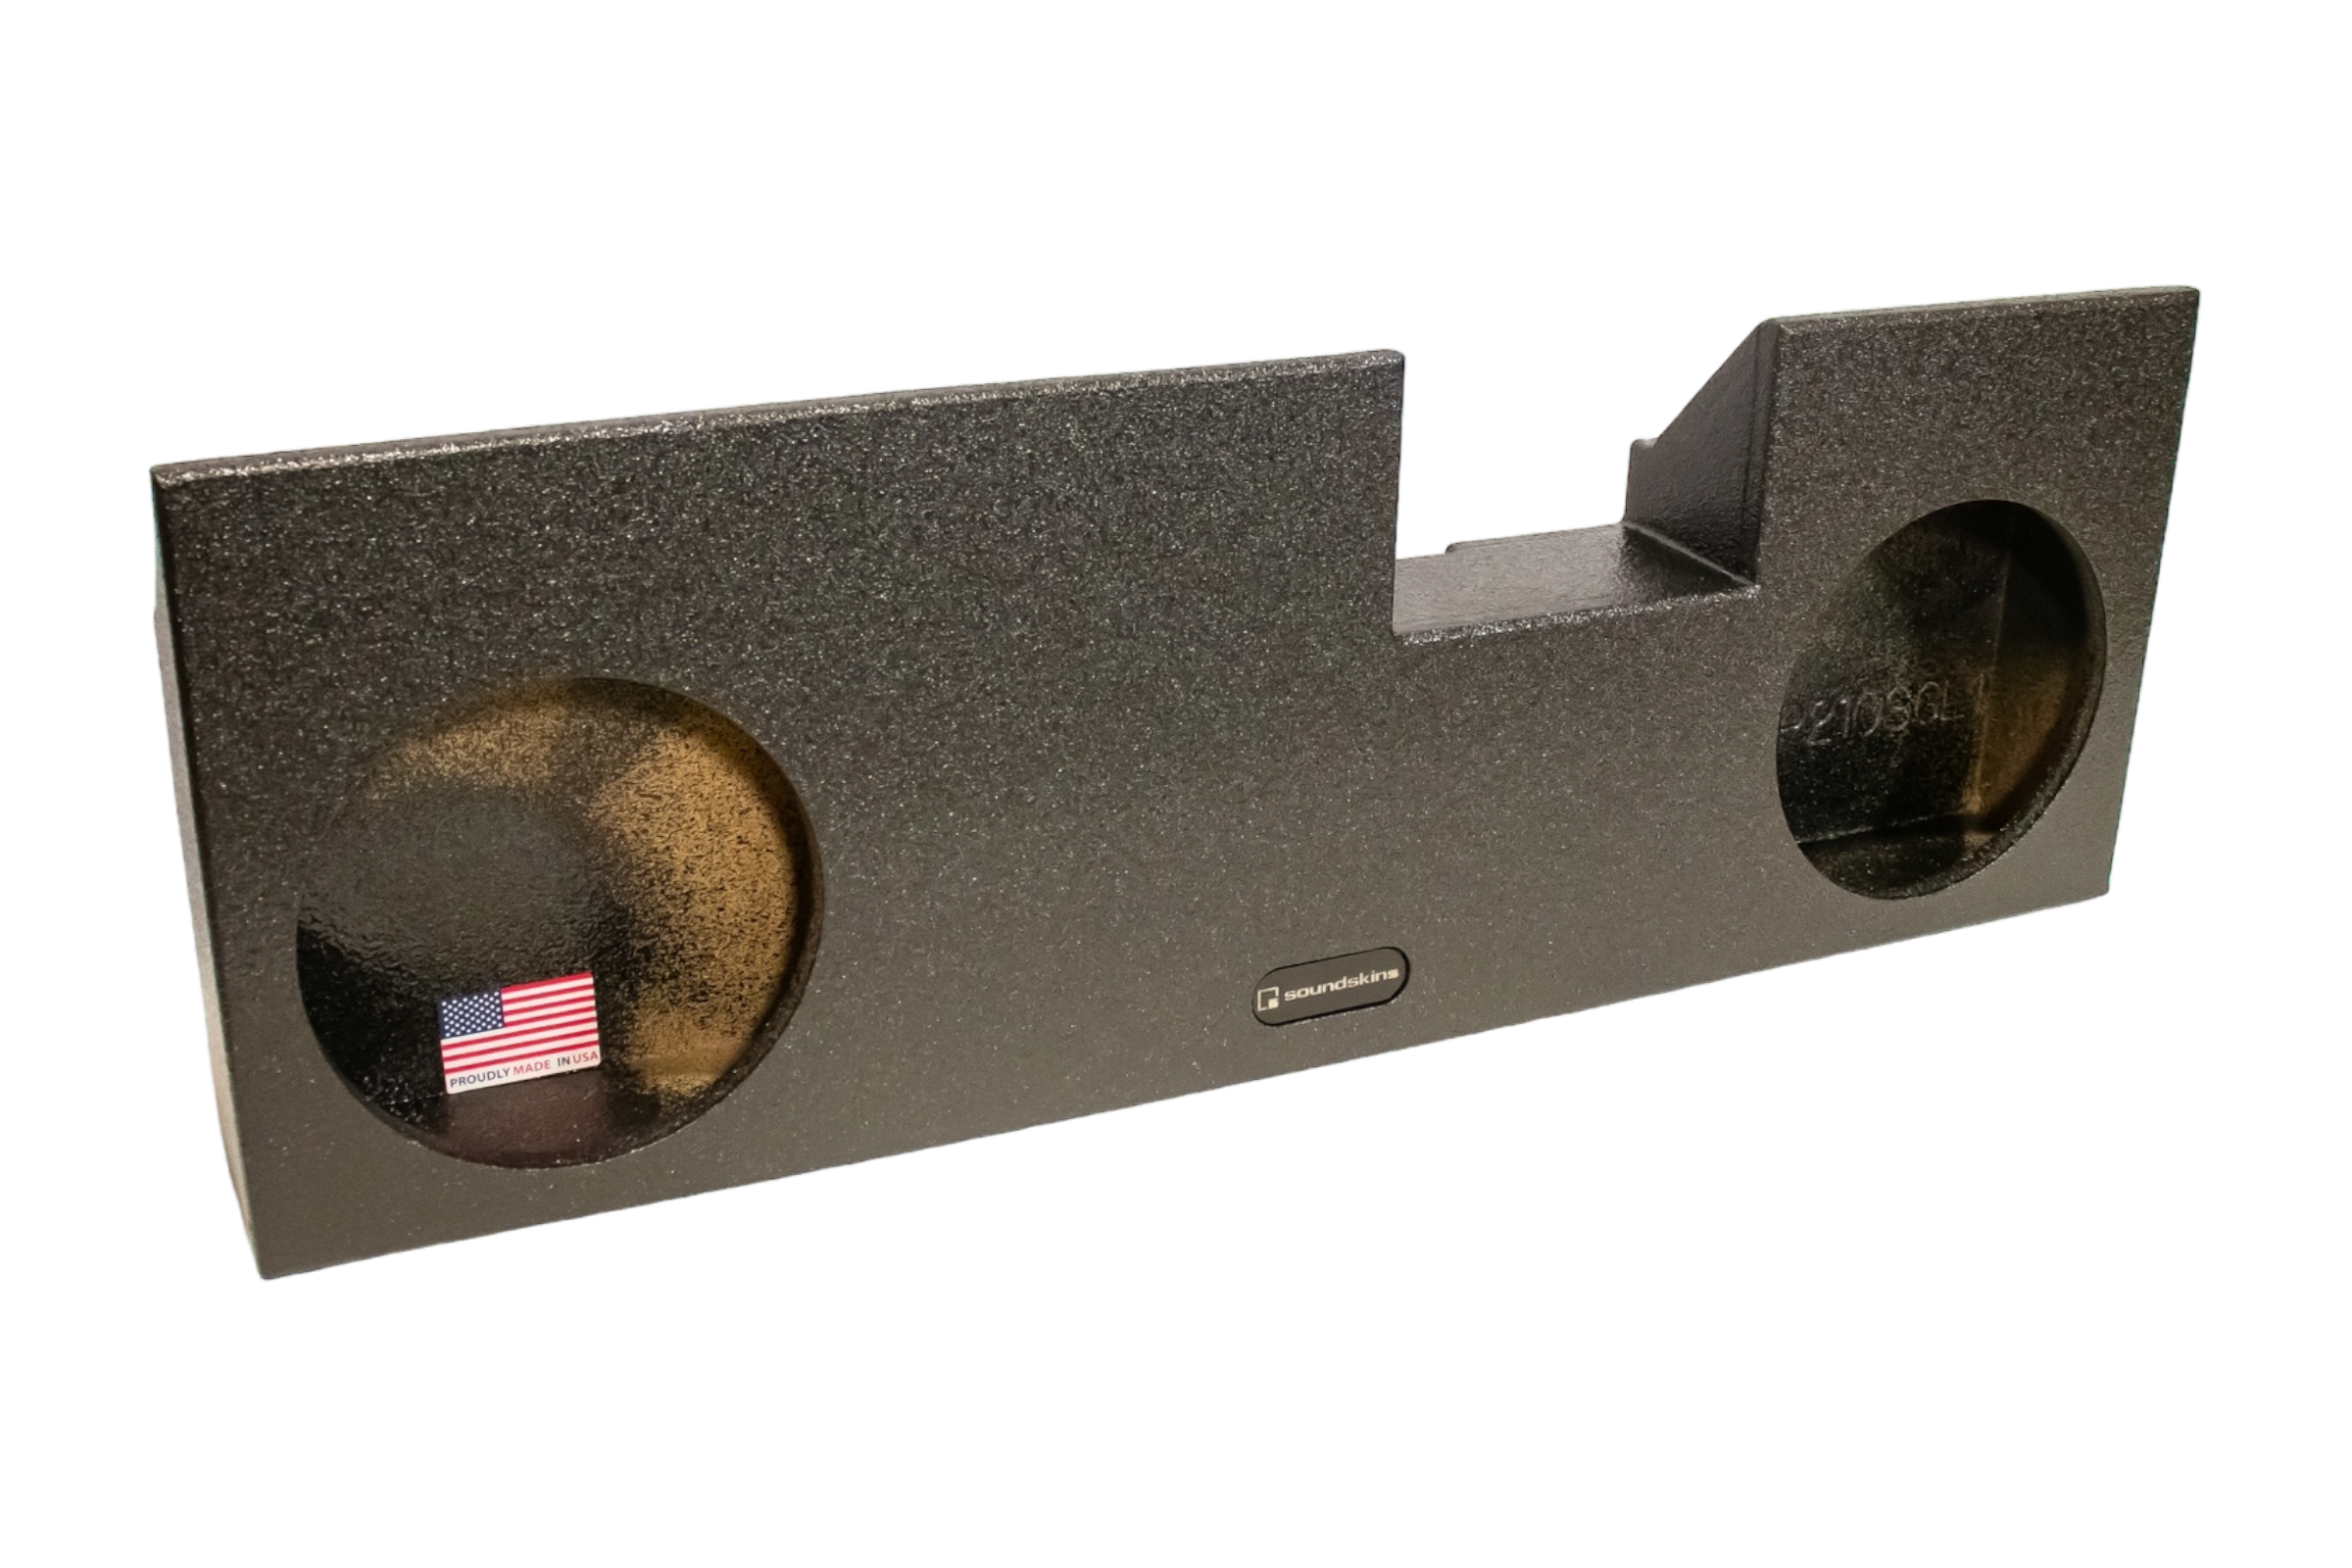
The Two Best Gladiator Sub Enclosures
Both boxes below are made in the USA from full 3/4" MDF and coated with a bed liner polymer spray. That finish matters in a Jeep. Mud, sand, wet gear, and open-air driving will ruin a carpeted box quickly.
Dual 10" Sealed for Tight, Clean Bass
The Jeep Gladiator 2018+ Dual 10" Sealed Subwoofer Enclosure is the slimmest option for the truck.
| Spec | Value |
|---|---|
| Design | Sealed, up fire |
| Width | 42" |
| Height | 5" |
| Depth | 14.5" |
| Mounting depth | 4.25" |
| Cutout diameter | 9.125" |
| Air space | 0.74 ft³ |
| Price | From $329 |
At only 5" tall, this box sits low under the seat. Sealed enclosures produce accurate, controlled bass that blends naturally with the rest of the system. It is the best match for rock, country, and anyone who wants the Gladiator to sound like a premium factory system with more depth.
A Kicker Solo-Baric version is available for square subwoofers.
Dual 8" Ported for Louder, Deeper Output
The Jeep Gladiator 2018+ Dual 8" Ported Subwoofer Enclosure is the choice for owners who want more volume and impact.
| Spec | Value |
|---|---|
| Design | Ported, front fire |
| Width | 43.75" |
| Height | 9" |
| Depth | 10.625" |
| Mounting depth | 6.3" |
| Cutout diameter | 7.32" |
| Air space | 1.25 ft³ |
| Tuning | 42Hz |
| Price | From $329 |
Do not let the 8" size fool you. The port and the 42Hz tuning give these smaller subs more output than you would expect, and the 6.3" mounting depth means you can run a much wider range of subwoofers. This is the stronger pick for hip-hop, EDM, and owners who drive with the top off often, since a ported box makes more bass for the same amp power.
This box is also available in a Kicker Solo-Baric version.
Sealed vs Ported in a Gladiator
| Dual 10" Sealed | Dual 8" Ported | |
|---|---|---|
| Sound | Tight, accurate, musical | Louder, punchier, more boom |
| Best for | Top-on daily driving | Top-off and doors-off driving |
| Sub choice | Shallow mount 10s | Wider range of 8s (6.3" depth) |
| Power needs | More amp power for volume | More output per watt |
| Best music | Rock, country, pop | Hip-hop, EDM, bass-heavy tracks |
Quick rule: If you keep the hardtop on most of the year, go sealed. If your Gladiator spends summer with the roof and doors off, go ported. The open cabin needs the extra efficiency.
Pro Tip: Check your subwoofer's mounting depth before you order. The Dual 10" sealed box allows only 4.25", so you need a shallow-mount 10. Picking the wrong sub is the number one mistake on this install, and it is easy to avoid by comparing the sub spec sheet with the box spec first.
What You Give Up and How to Plan for It
Installing either box means removing the factory jack kit and the under seat storage tray. That is the only real trade-off.
Important Note: Before installation, decide where your jack and tools will live. Many Gladiator owners move the jack to the bed or a mounted tool bag. Do not leave it loose in the cab. A loose jack becomes a dangerous projectile on rough trails or in a sudden stop.
Upgrade the Terminal Cup if You Run Real Power
Both Gladiator boxes offer an upgraded SMD TCR-1 terminal cup. The standard cup supports around 500 watts. The SMD cup handles up to 2000 watts, uses rust-resistant stainless steel hardware, and has a 5/16" bolt terminal. For a Jeep that sees mud, water crossings, and washdowns, corrosion-resistant hardware is worth the small extra cost, especially with a strong amp.
Pick the Right Amplifier and Wiring
The box and subs are only part of the system. A few basics keep everything reliable.
- Match the amp to the subs. Choose an amp whose RMS rating at your final impedance matches the combined RMS rating of both subs.
- Use the right wire gauge. Undersized power wire causes voltage drop and weak bass.
- Fuse near the battery. Always place an inline fuse within a short distance of the battery.
- Mount the amp where it stays dry. Doors-off driving and rain can reach places you would not expect. Keep the amp protected and ventilated.
- Set gains with care. Gain is not a volume knob. Set it low and increase gradually to avoid distortion that can damage subs.
Sound Deadening Is What Makes a Gladiator Sub Sound Great
Here is the part most owners skip and then regret. The Gladiator has thin, flat door panels, a large rear cab wall, and a roof that vibrates easily. Add bass, and those panels start rattling. The rattle masks the low end, and road noise covers what is left.
Sound deadening solves both problems. It stops panel vibration so bass sounds clean, and it lowers road and wind noise so you hear more detail without turning the volume up. On a Jeep, it is the difference between a sub that rumbles and a system that sounds composed.
Two kits are made specifically for the Gladiator:
- SoundSkins Jeep Gladiator 4-Door Vehicle Specific Kit (2020+) covers all four doors with 21.5 sq ft of pre-cut material for $319. This is the best starting point, since doors are where rattles and lost mid-bass begin.
- SoundSkins Pro Jeep Gladiator Noise Reduction Kit at $495 extends coverage for owners who want the quietest cab possible and the best foundation for a full audio build.
Pre-cut kits save time and waste because each piece is shaped to the panel, so there is no measuring or trimming.
Jeep doors and hardtops behave differently and need separate treatment, which is covered in detail in why Jeep doors and hardtops need different noise control plans. If a buzz shows up after the sub is installed, this guide on how to find the exact spot causing a car interior rattle helps track it down fast.
Pro Tip: Install the door deadening on the same day as the subwoofer. You already have trim tools out and panels coming off for wiring, so doing both jobs together saves hours and gives you the full improvement on the first listen.
Three Gladiator Bass Setups That Work
The Daily Driver Setup
Dual 10" Sealed box, two shallow-mount 10s, a modest mono amp, and the Gladiator 4-Door deadening kit. Clean, full bass that sounds factory premium and stays quiet at highway speed.
The Top-Off Summer Setup
Dual 8" Ported box, two 8s, a matched amp with the SMD terminal cup upgrade, and door deadening. Strong output that holds up even with the roof panels off.
The Complete Build
Either box, a quality amp, upgraded door speakers, and the Pro Gladiator Noise Reduction Kit. The quietest cab and the most balanced sound the Gladiator can deliver.
Installation Overview
- Disconnect the negative battery terminal.
- Fold up the rear seat and remove the factory jack kit and storage tray.
- Run power wire from the battery through the firewall with an inline fuse near the battery.
- Mount the amplifier in a dry, ventilated location.
- Run the remote turn-on and signal wires, using a line output converter if you keep the factory head unit.
- Install the subwoofers in the box and wire them to your amp's target impedance.
- Secure the box under the seat so it cannot shift on trails.
- Reconnect the battery, set the crossover and gain, and test at low volume before turning it up.
Frequently Asked Questions
What is the best subwoofer box for a Jeep Gladiator?
For most owners, the Dual 10" Sealed under seat enclosure is the best all-around choice. If you drive with the top off often or want more volume, the Dual 8" Ported is the better pick.
Can you put a subwoofer under the seat of a Jeep Gladiator?
Yes. The Gladiator has room under the rear bench for a dual sub enclosure. You remove the factory jack kit and storage tray, and the box sits in that space.
Will I lose rear seating with an under seat sub box?
No. The box mounts under the bench, so the rear seat stays fully usable.
Are 8" subs enough for a Gladiator?
Yes. In a well-designed ported box like the Dual 8" Gladiator enclosure, two 8s deliver strong, deep bass for the cab size, especially with a tuning of 42Hz.
Do I need shallow mount subwoofers?
For the Dual 10" Sealed box, yes, since it allows 4.25" of mounting depth. The Dual 8" Ported box allows 6.3", which fits most standard 8" subs.
Do these boxes fit Kicker square subwoofers?
Both Gladiator enclosures are available in Kicker Solo-Baric specific versions.
Does sound deadening help a Gladiator subwoofer?
Yes. Deadening stops door and panel rattles caused by bass and reduces road and wind noise, so the subwoofer sounds cleaner and you need less volume to enjoy it.
Build the Gladiator Sound System It Should Have Had
The Gladiator was made for open roads and rough trails, and it deserves bass that keeps up with both. Choose the Dual 10" Sealed for clean daily listening or the Dual 8" Ported for top-off power, add door deadening to kill the rattles, and your Jeep will sound as capable as it drives.
Shop Jeep Gladiator subwoofer enclosures at SoundSkins Global, with free shipping on all orders to the continental U.S.


